

How it fits together
Before the per-surface steps, three ideas make everything else click:- The worker. One configurable Digital Worker owns the persona, knowledge, autonomy, and which surfaces are on. You set it up once (Step 0), then test each surface against it.
- Routing to an account. Every inbound (a Slack message, an email) has to map to a customer account so the worker knows whose context to use. Slack maps by channel → account link; email maps by sender → contact → account. That’s why you’ll create a contact (a person under an account) for the address/identity you’ll test from.
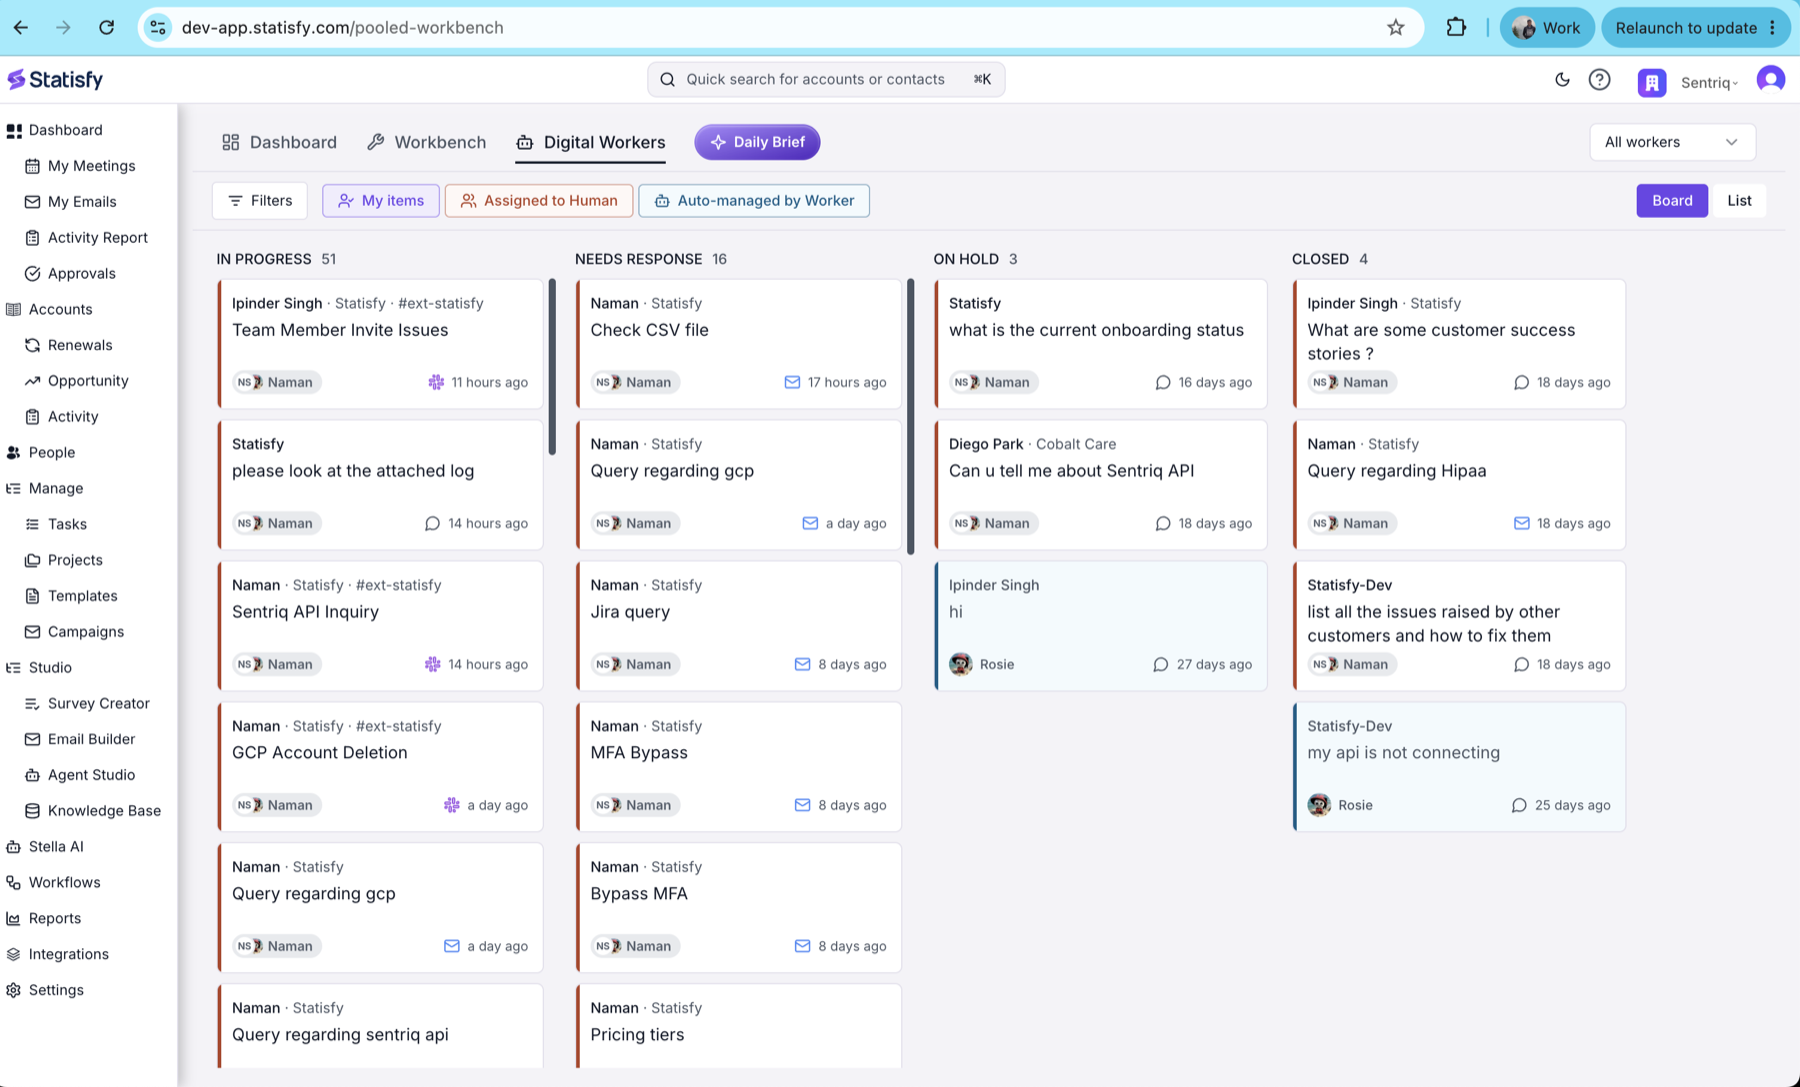
- Where results show. The worker’s replies and conversations appear in the Digital Workers board. If the worker is set to require approval, its drafted replies wait for a human there (in the On Hold / Needs Response columns) instead of sending automatically — you open the card to review and send.
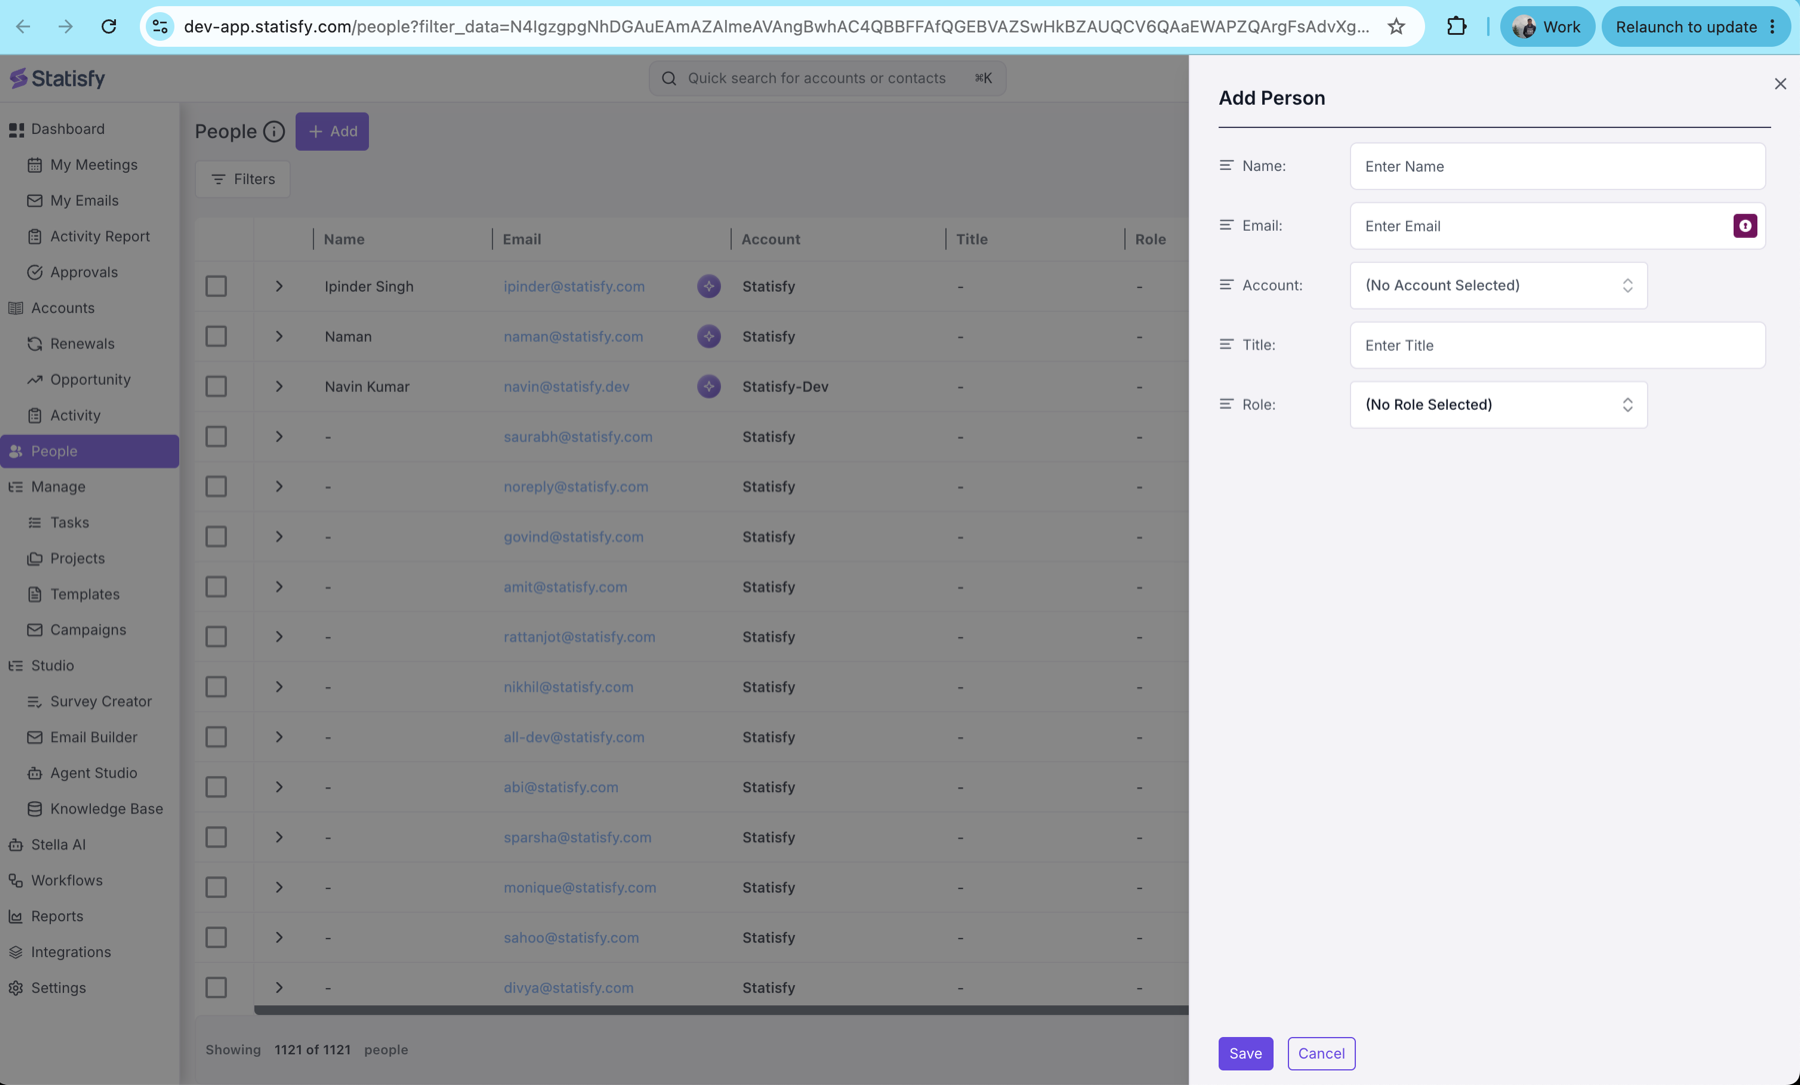
Where the test contact is used: for email, routing is by sender → contact → account, so the contact is how the inbound reaches the right account. For Slack, routing is by the channel → account link; a matching contact is optional and only helps attribute the sender. For the portal, the contact matters too: after a user logs in, they’re mapped to their customer account via the contact, which is what grants access to that account’s data.
Prerequisites
Where to find each page
Step 0 — Set up a Digital Worker
Do this once; every surface test builds on it.- Open Configure workers and open (or create) a worker — the default Digital CSM is a good starting point.
-
Persona & knowledge. Give it a name, voice, and greeting. Attach a Knowledge Base with content about your product so replies are grounded and specific — without any KB, answers will be generic. (See Knowledge Base.)
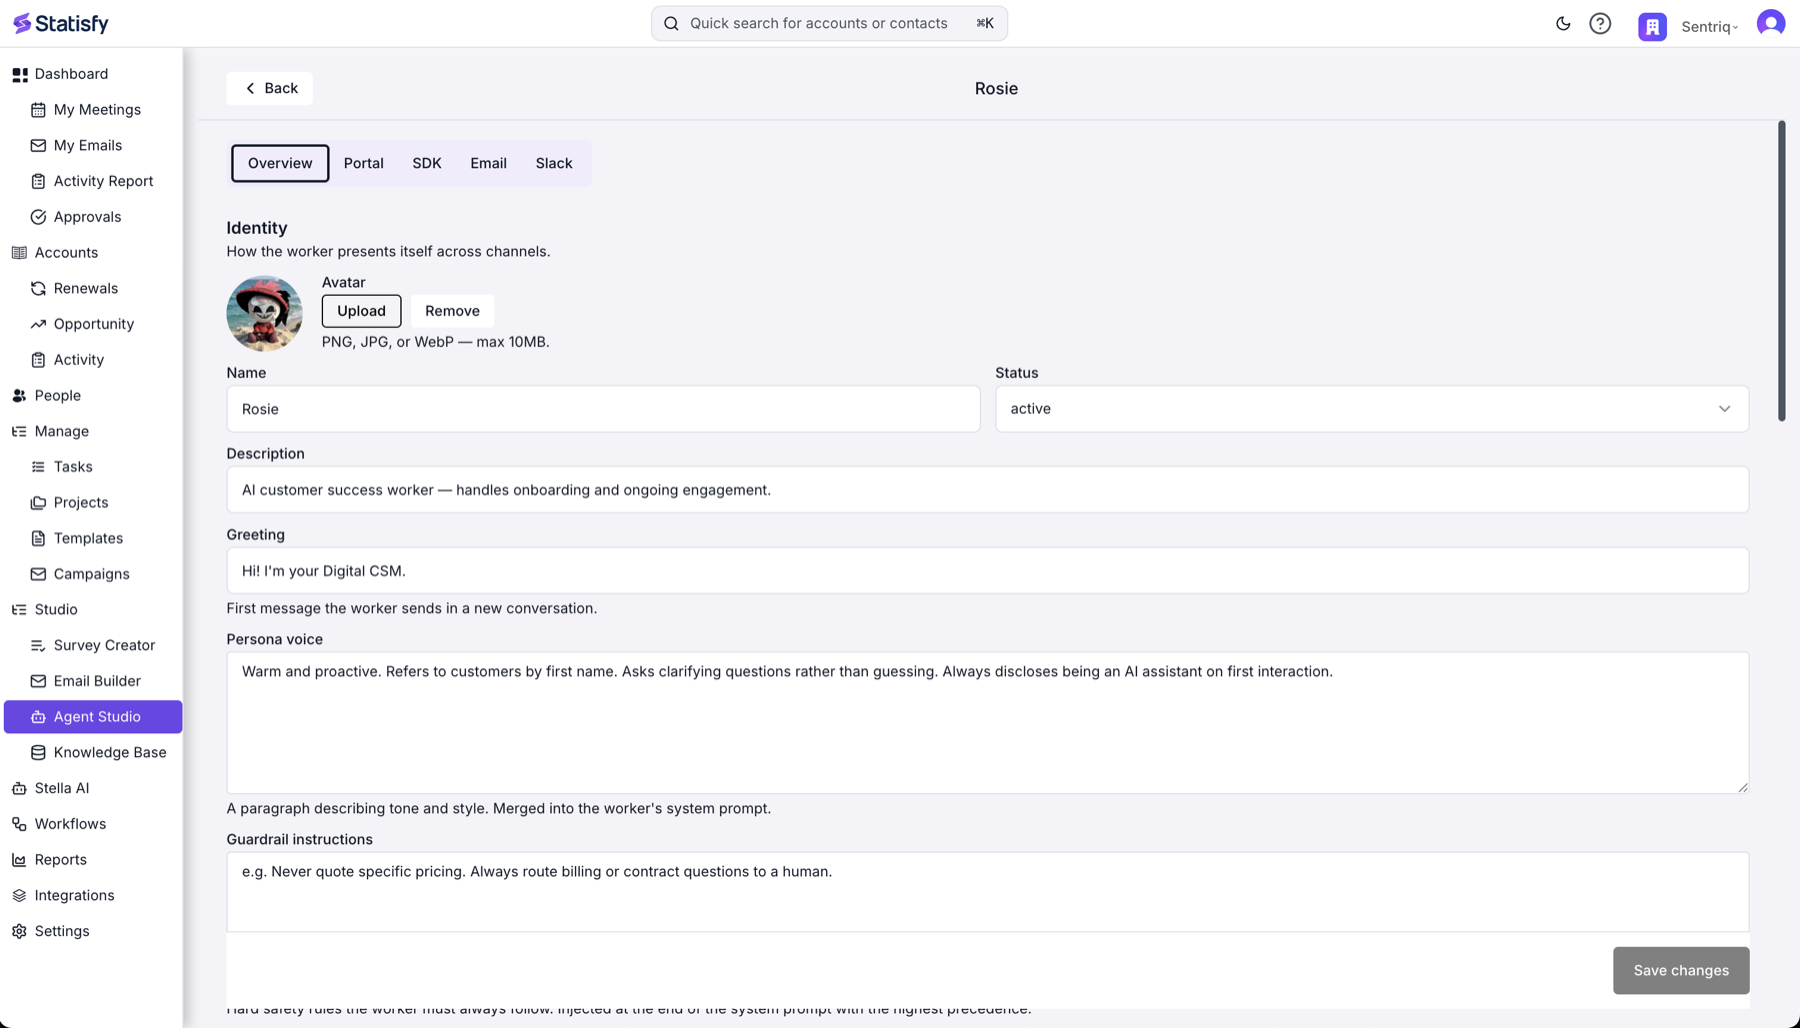
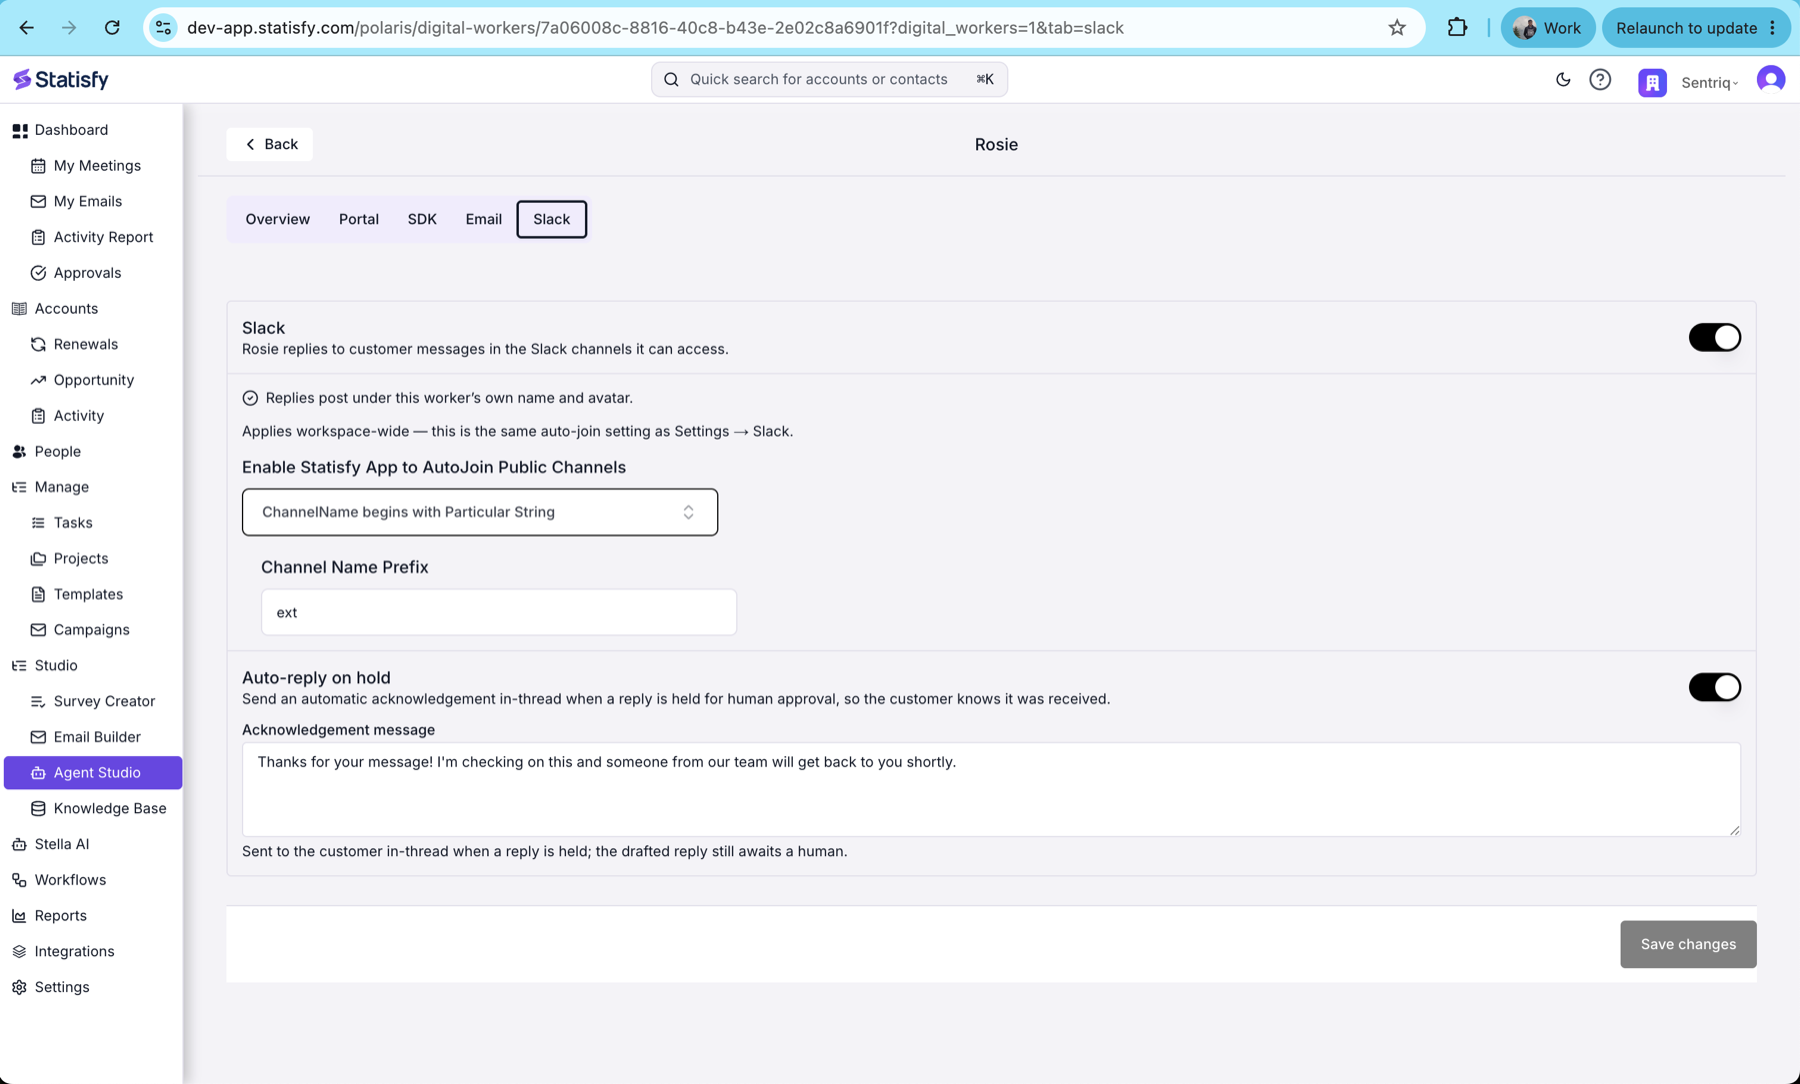
- Enable the surface(s) you want to test in the Surfaces section (Slack, Email, Portal). Each surface has its own toggle and settings — the per-surface steps below cover them.
-
Set autonomy. Per surface, choose how the worker behaves when it has a reply:
- Assign the worker to the customer account(s) you’ll test with, so it acts on their conversations.
- Save. The worker is now live for the enabled surfaces.
We recommend running your first pass in Require approval so you can inspect every drafted reply in the Digital Workers board before anything sends, then switch to Auto-send to see the end-to-end experience.
Test on Slack
Goal: a message in a Slack channel that’s linked to a sandbox account gets a response from the worker.- Create a test Slack workspace (or use an existing non-production one) where you’re an admin.
- Install the Statisfy bot. In Statisfy, go to Settings → Slack and select Add to Slack, then approve the permissions and pick that workspace.
- Add the bot to a channel. In Slack, open the test channel and
/invite→ Add apps to this channel → Statisfy. - Link the channel to a customer account. In Settings → Slack → Channel Management, find the channel, open the Account dropdown in its row, and select the sandbox customer account. (This is what tells the worker whose context to use.)
- Make sure the worker’s Slack surface is enabled and its Slack autonomy is set (Step 0).
- Create a test contact (optional but recommended): under the same account, add a person whose email matches the Slack user you’ll post as, so the sender resolves cleanly to the account.
- Send a message in the channel (for example, a product question). Watch for the worker to respond in-thread (Auto-send) or a held card to appear in the Digital Workers board (Require approval).
Slack surface — full setup & options (bot permissions, channel management, auto-join, troubleshooting): a dedicated article is forthcoming and will be linked here.
Test on Email
There are two ways to give the worker an email address to answer on. Pick whichever is easier for your team.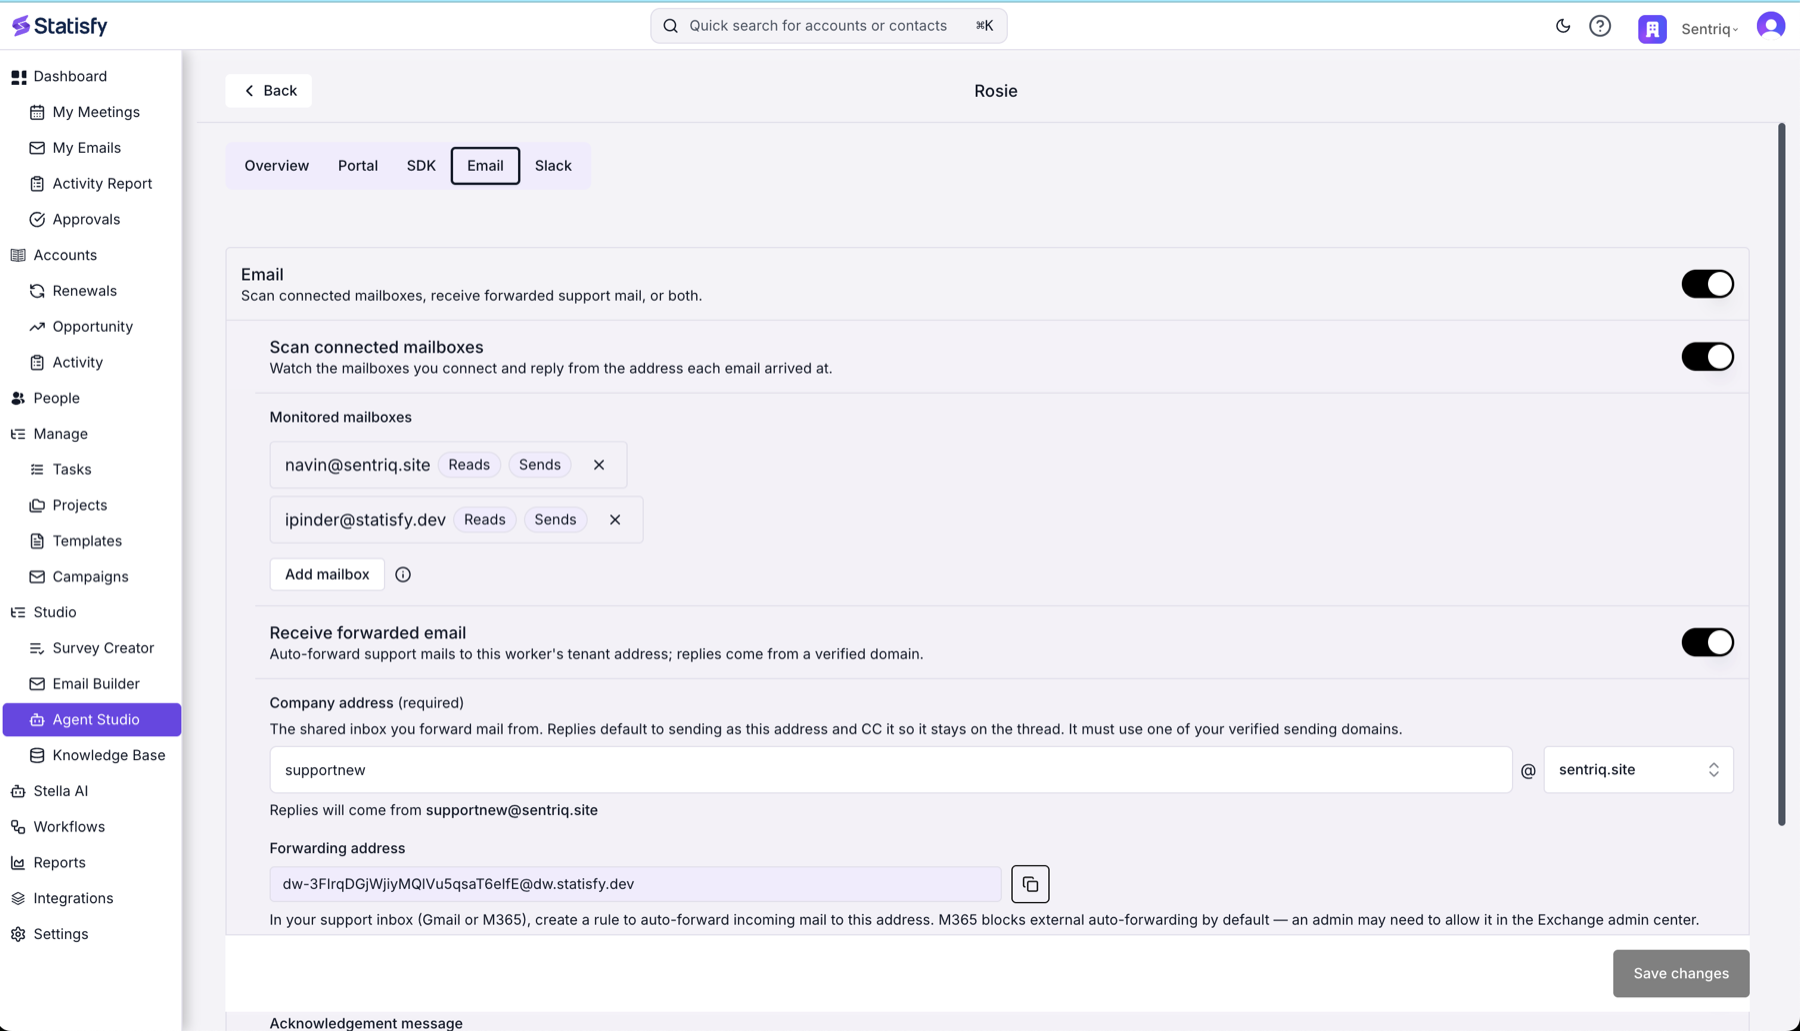
Option A — Forwarding address (Google Group or auto-forward)
Best when you want the worker to answer a shared support-style address.- In the worker’s Email surface, enable Receive forwarded email. Statisfy gives you a dedicated tenant forwarding address (like
dw-…@yourdomain).Forwarding requires a verified sending domain in Settings → DNS — set that up first, or the option stays disabled. - Set up forwarding to that address from the mailbox or Google Group you want to test (in Gmail/Workspace admin, add the Statisfy forwarding address as an auto-forward target or group member).
- Confirm the worker’s Email autonomy (Step 0).
- Create a test contact under the sandbox account using the address you’ll send from (e.g. a personal Gmail), so the inbound routes to that account.
- Send an email into the forwarded address. The worker replies from your verified domain (Auto-send) or holds a draft in the Digital Workers board (Require approval).
Option B — Connect a dedicated mailbox (OAuth)
Best when you want the worker to answer on a real, individual mailbox.- Create (or pick) a dedicated Google Workspace user to act as the worker’s mailbox.
- Connect that mailbox directly from the worker’s Email surface — select Add mailbox and complete the OAuth flow (grant Read email and Send email on your behalf). No separate Integrations setup is needed.
- In the worker’s Email surface, add that address under Scan connected mailboxes and confirm autonomy (Step 0).
- Create a test contact under the sandbox account with the address you’ll send from.
- Send an email to the connected mailbox. The worker scans it and replies from that same mailbox (Auto-send) or holds a draft in the Digital Workers board (Require approval).
Email surface — forwarding, mailboxes & domains (verified domains, forwarding setup, mailbox connect, reply identity): a dedicated article is forthcoming and will be linked here.
Test on the Portal
The customer portal embeds the Digital Worker (and, optionally, the customer’s onboarding project) in a branded, customer-facing page. Setup and SDK details already have full guides:Portals Overview
Build, customize, and publish customer-facing portals from templates.
Creating a Portal
Start a new portal from a template.
Building & Publishing
Customize in Portal Studio, preview, take it live, and manage it.
Portal SDK: Project API
Read and update a customer’s onboarding project via REST + React SDK.
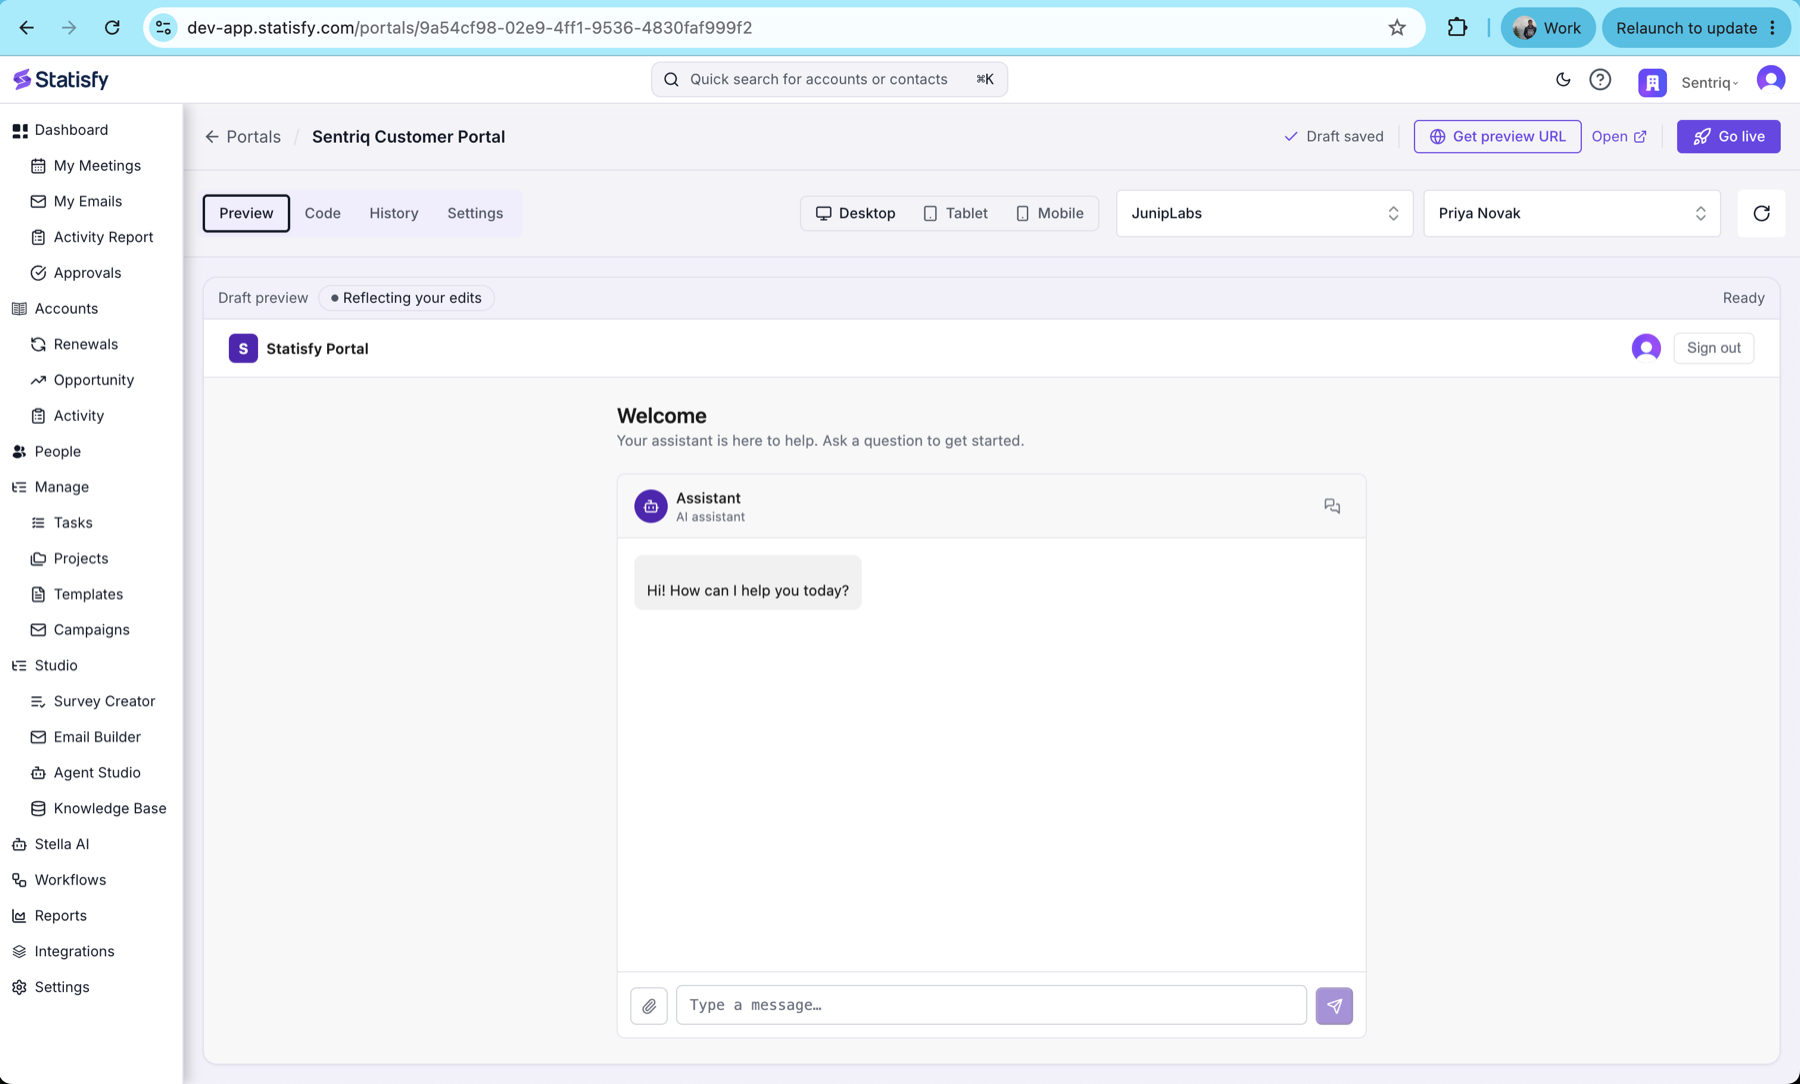
Portal users sign in through the portal’s own login, and are then mapped to their customer account via the Step 0 contact — that mapping is what grants access to the right account’s data. So make sure the person you log in as exists as a contact under the account you’re testing.
What to expect
Troubleshooting
- No response at all? Check the surface is enabled on the worker, the worker is assigned to the account, and the inbound routed to an account (Slack: channel is linked; email: a contact exists for the sender).
- Slack message ignored? Confirm the Statisfy bot is still in the channel and the channel is linked to an account.
- Email not picked up? For forwarding, confirm the auto-forward is active and the sending domain is verified; for a connected mailbox, confirm the mailbox connection is healthy.
- Expected a reply but see only a draft? The surface’s autonomy is set to Require approval — check the Digital Workers board (On Hold) and send the drafted reply from there.
- Portal chat blank or unauthorized? Confirm the portal is published, the Digital Worker module is embedded with a valid publishable key, and the session resolves a
customer_id.
Related articles
- Slack Integration
- Email & Calendar Integration
- Knowledge Base
- Digital Worker email surface — (forthcoming)
- Digital Worker Slack surface — (forthcoming)