

Video Tutorial
In this article, you’ll learn how to navigate the Projects section under Manage and how to use its features effectively. Step 1: Navigate to the Manage section and select Projects. Here, you’ll find all the projects associated with your account.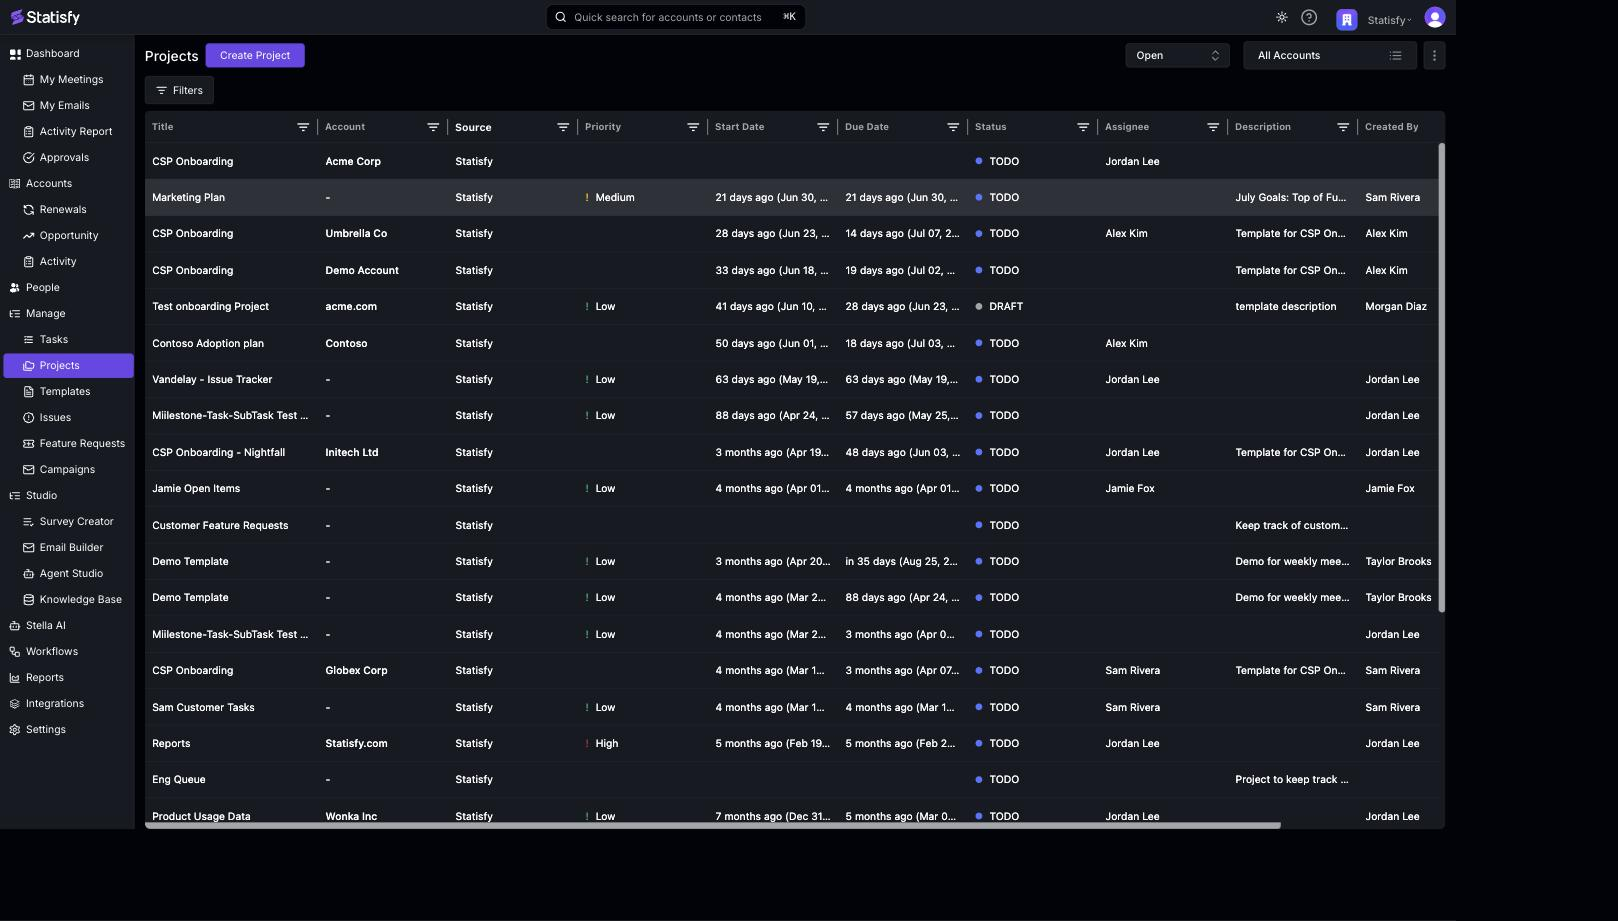 Step 2: Use the view selector in the top-right (My Book or All Accounts) to switch between projects on your book and every project you can access.
Step 3: Use the Filters button and the per-column filters to refine the list by title, account, source, status, and more.
Step 4: To create a new project, click the Create Project button in the top-left. We’ll cover the details of creating a project in the next section.
Step 2: Use the view selector in the top-right (My Book or All Accounts) to switch between projects on your book and every project you can access.
Step 3: Use the Filters button and the per-column filters to refine the list by title, account, source, status, and more.
Step 4: To create a new project, click the Create Project button in the top-left. We’ll cover the details of creating a project in the next section.
Learn More
Task Dependencies & Auto-Cascade
Manage blocking relationships and keep task dates in sync automatically
Milestones & Task Hierarchy
Structure projects with milestones and multi-level subtasks
Reorder & Reparent Tasks
Drag and drop to reorder and restructure tasks
Export Project Tasks
Export tasks to CSV or Excel