

Video Tutorial
In this tutorial, you’ll learn how to add a manual activity to your account. This feature is useful for tracking and documenting your activities. Step 1: Navigate to your account.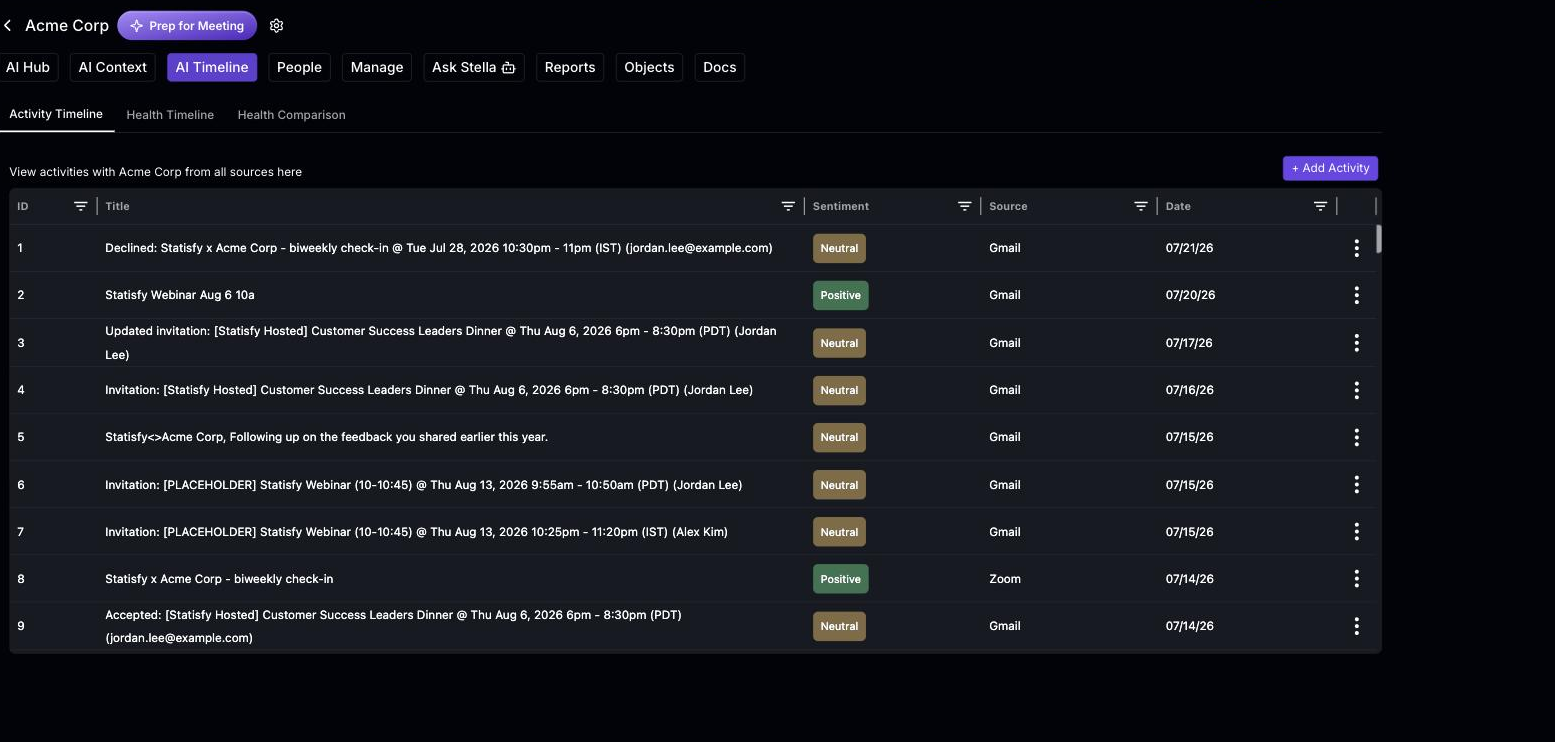 Step 2: View the AI timeline. This displays all the activities captured automatically.
Step 3: Click on the + Add Activity button to add a manual activity.
Step 4: Enter the activity title, notes, date, and attendees.
Step 2: View the AI timeline. This displays all the activities captured automatically.
Step 3: Click on the + Add Activity button to add a manual activity.
Step 4: Enter the activity title, notes, date, and attendees.
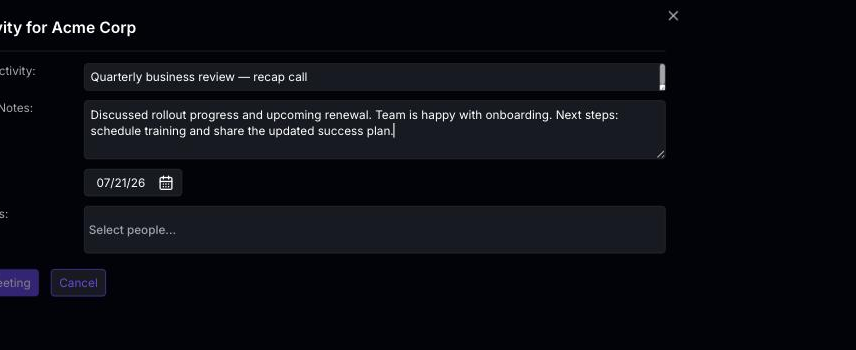 For instance, let’s add a test activity.
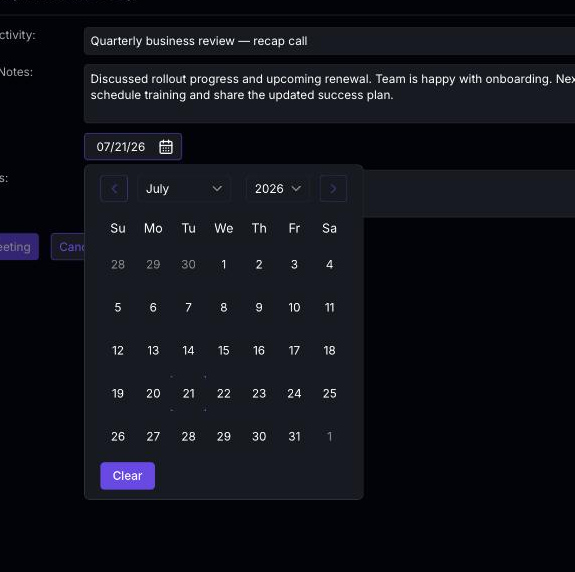
Step 5: Select the date for the activity. In this case, we’re selecting today’s date.
For instance, let’s add a test activity.
Step 5: Select the date for the activity. In this case, we’re selecting today’s date.
 Step 6: After adding the activity details, click Process Meeting. The system then displays an Activity Insights section with the sentiment based on the meeting notes. It provides a brief description and the reason for the sentiment.
Step 7: If you’re satisfied with the details, click on the Save button. If you want to change the sentiment, update it and add some comments.
Then, click on the Save button.
Step 8: Once saved, the activity will appear in the timeline, sorted by date and sentiment.
By clicking on the activity, you can view the details you’ve entered. And that’s it! You’ve successfully added a manual activity.
Step 6: After adding the activity details, click Process Meeting. The system then displays an Activity Insights section with the sentiment based on the meeting notes. It provides a brief description and the reason for the sentiment.
Step 7: If you’re satisfied with the details, click on the Save button. If you want to change the sentiment, update it and add some comments.
Then, click on the Save button.
Step 8: Once saved, the activity will appear in the timeline, sorted by date and sentiment.
By clicking on the activity, you can view the details you’ve entered. And that’s it! You’ve successfully added a manual activity.