Video Tutorial
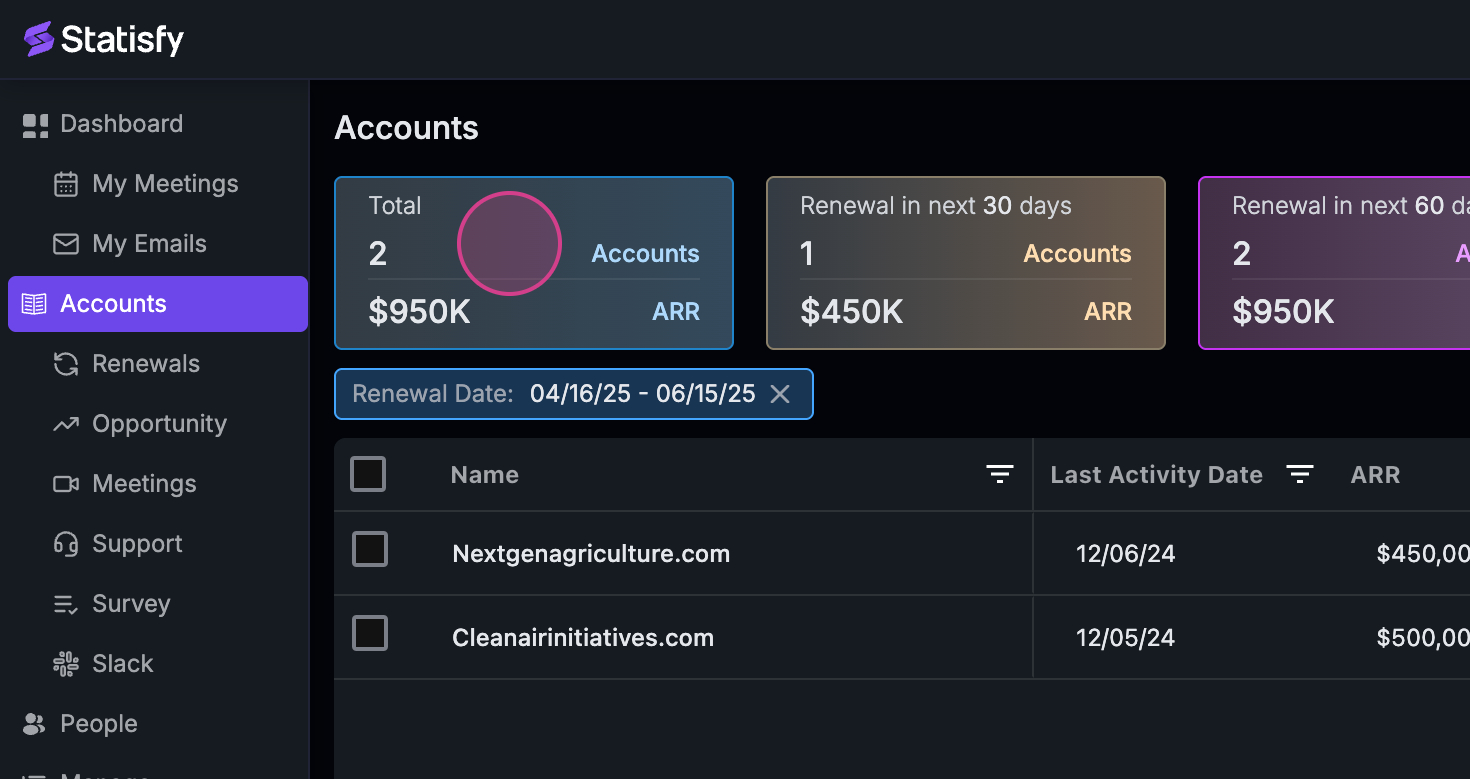
This article will guide you through the process of navigating and applying filters in the admin view. By the end, you’ll be able to understand and manage your accounts effectively. Step 1: Start by observing the four tabs at the top of your screen.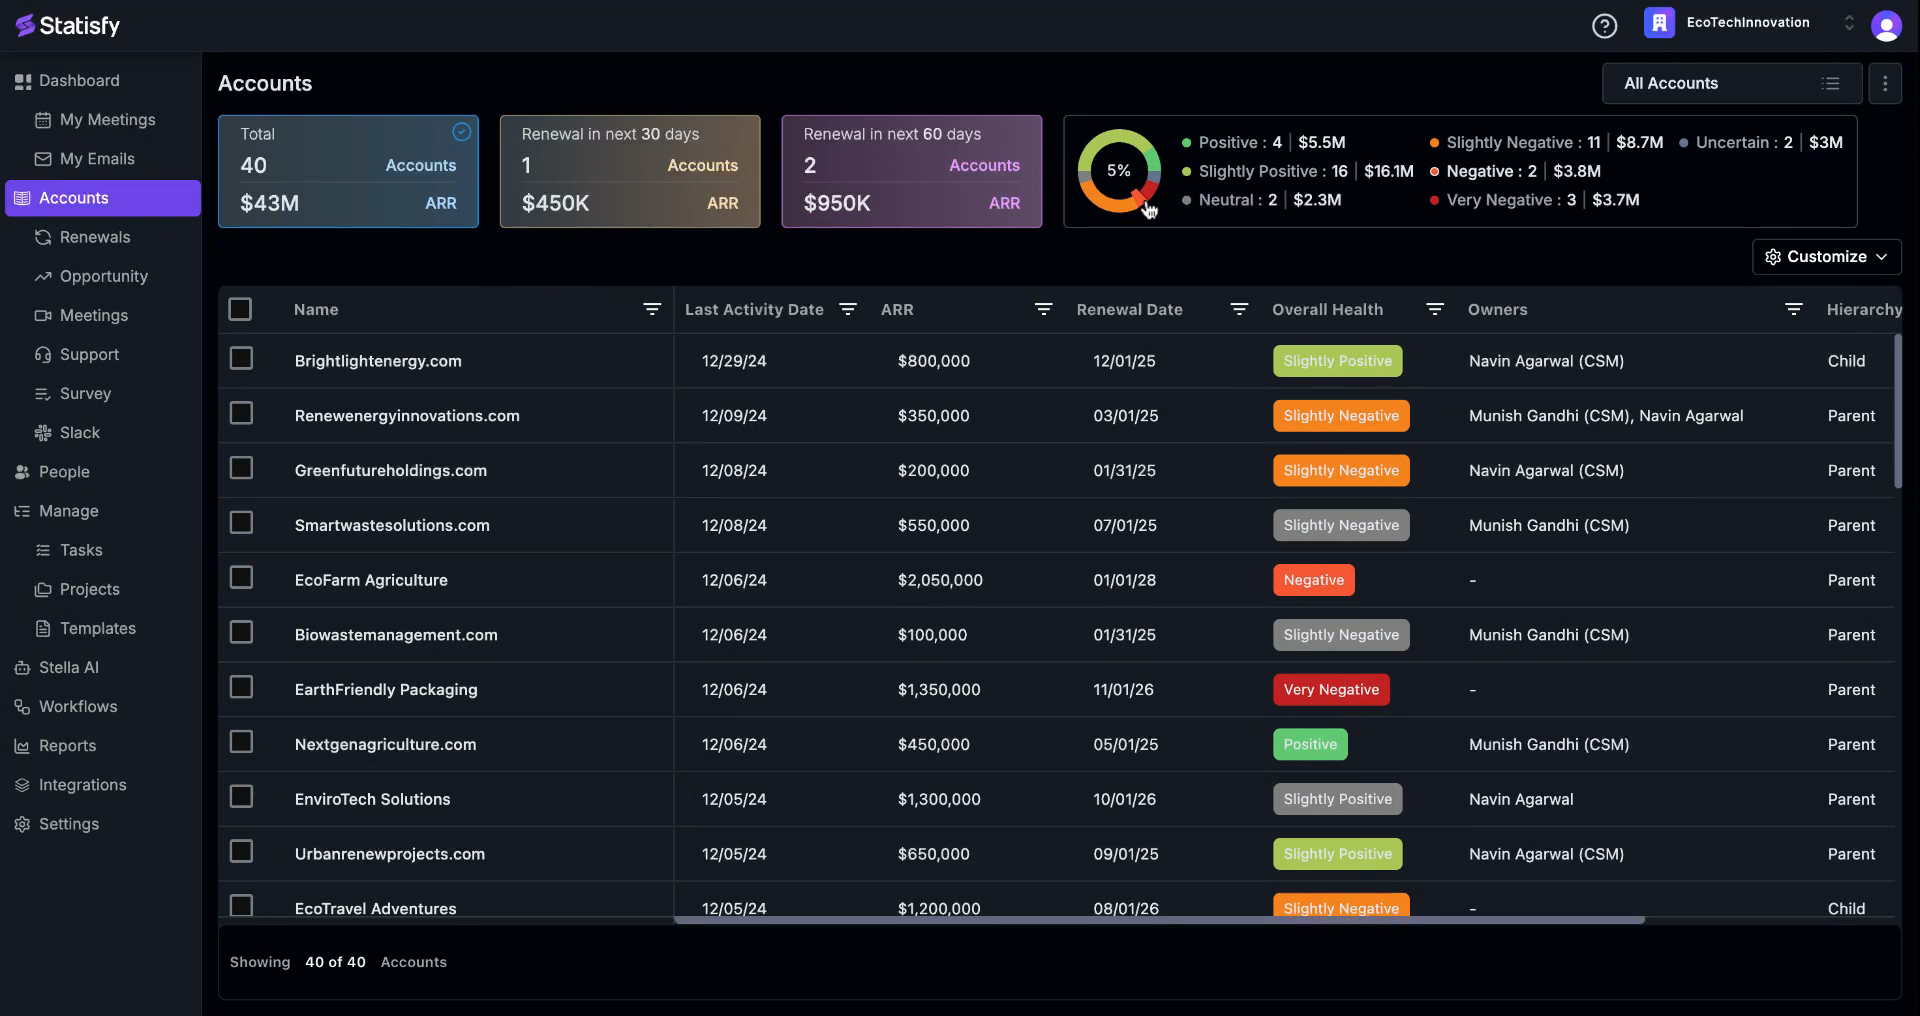 Step 2: Each tab provides specific information. The first tab, for instance, displays the total number of accounts and the direction of the arrow.
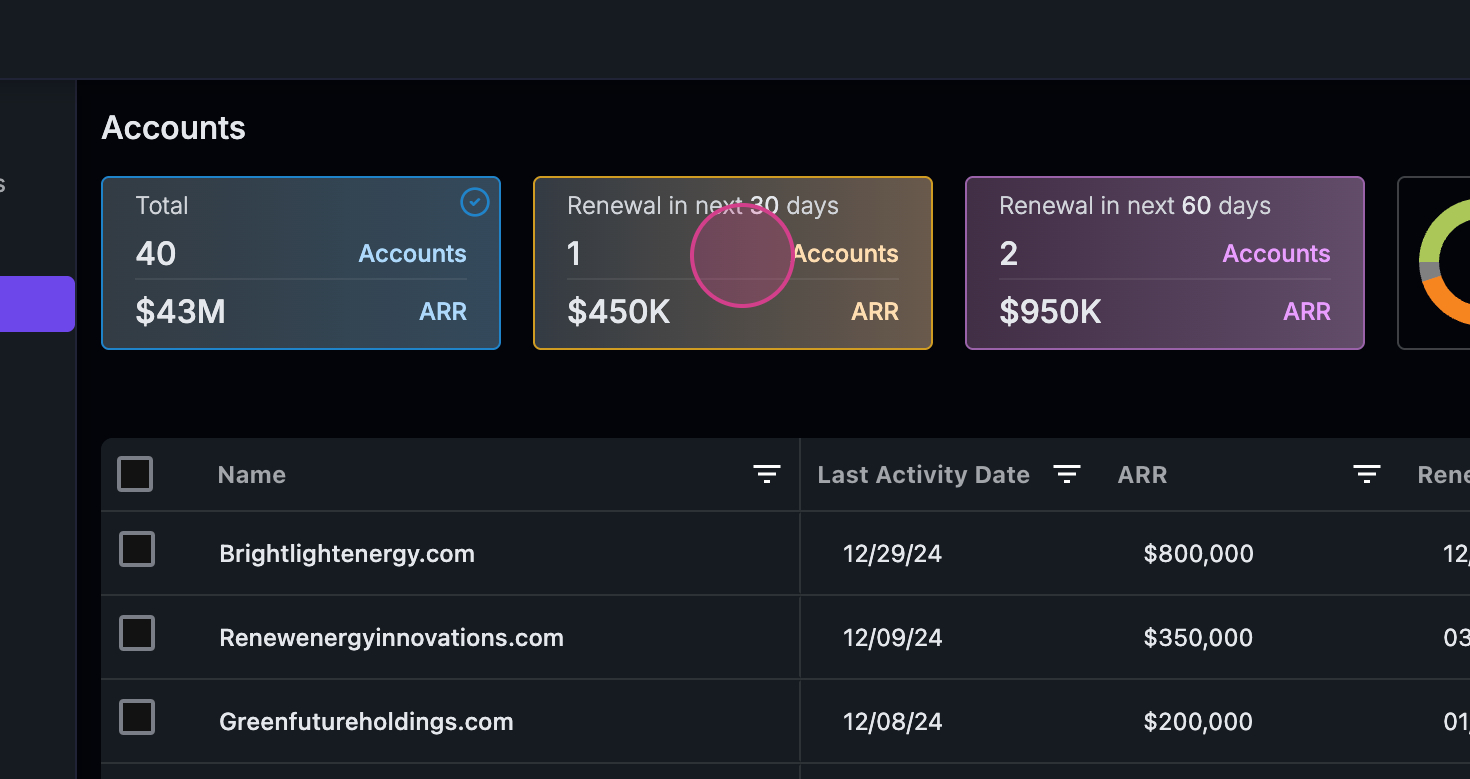
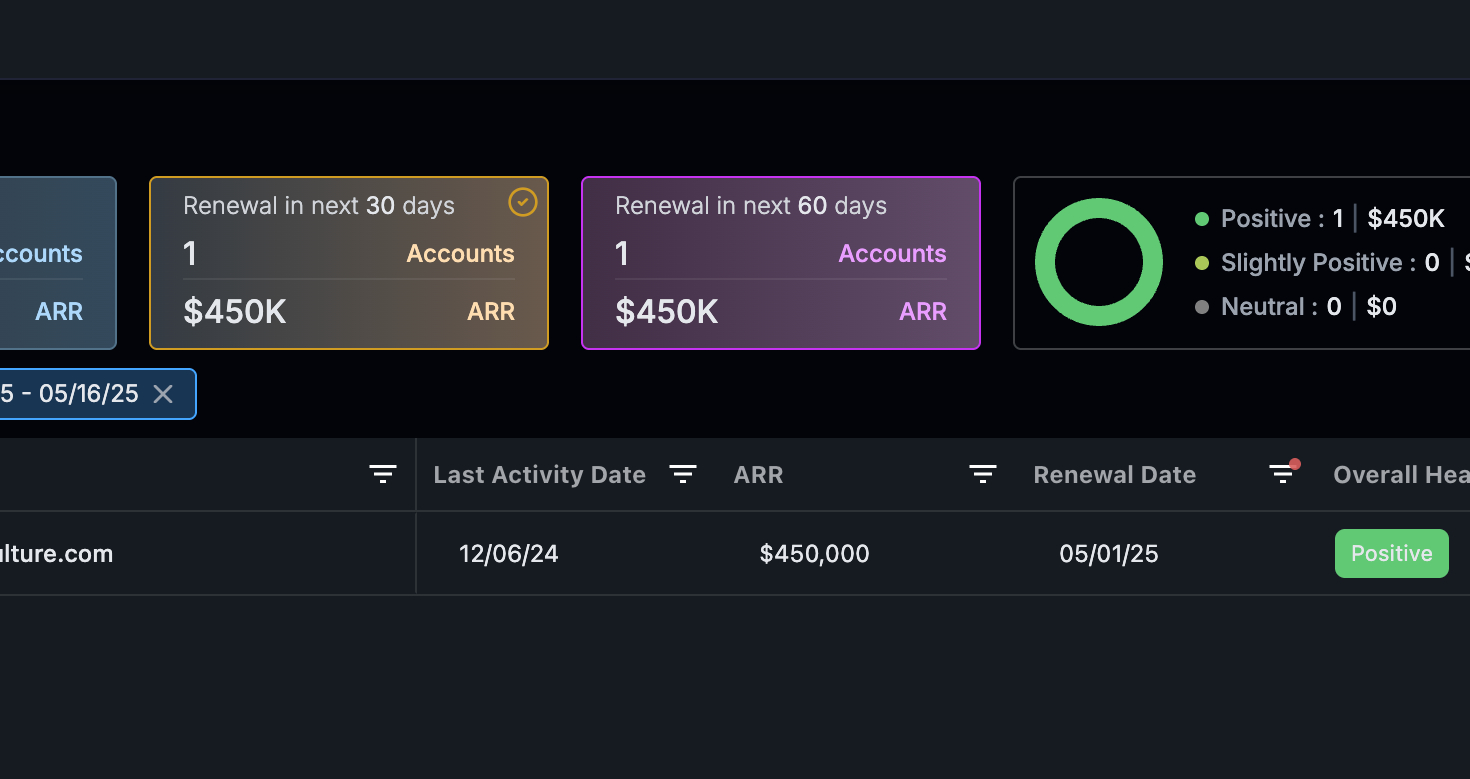
 Step 3: The second tab shows the accounts due for renewal in the next 30 days and their ARR (Annual Recurring Revenue).
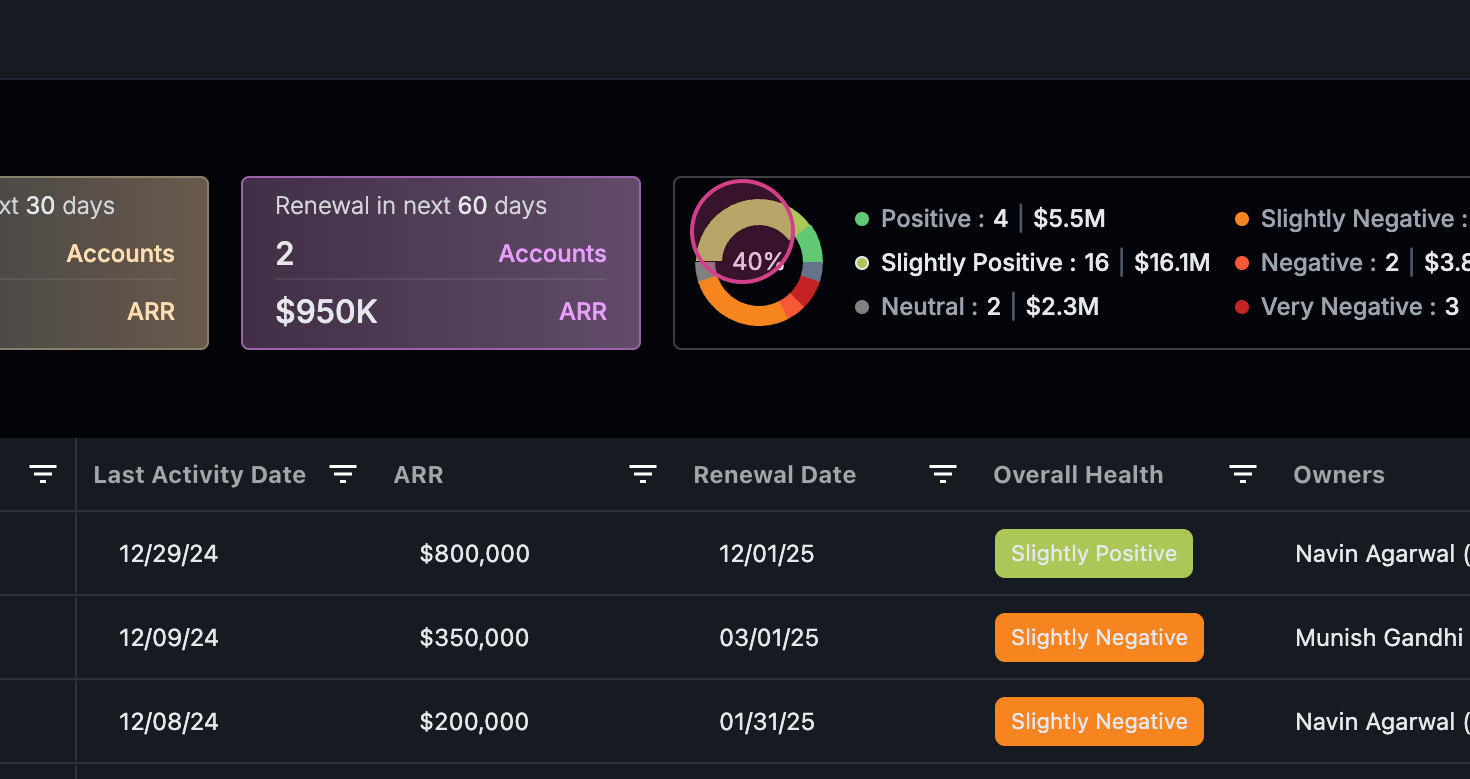
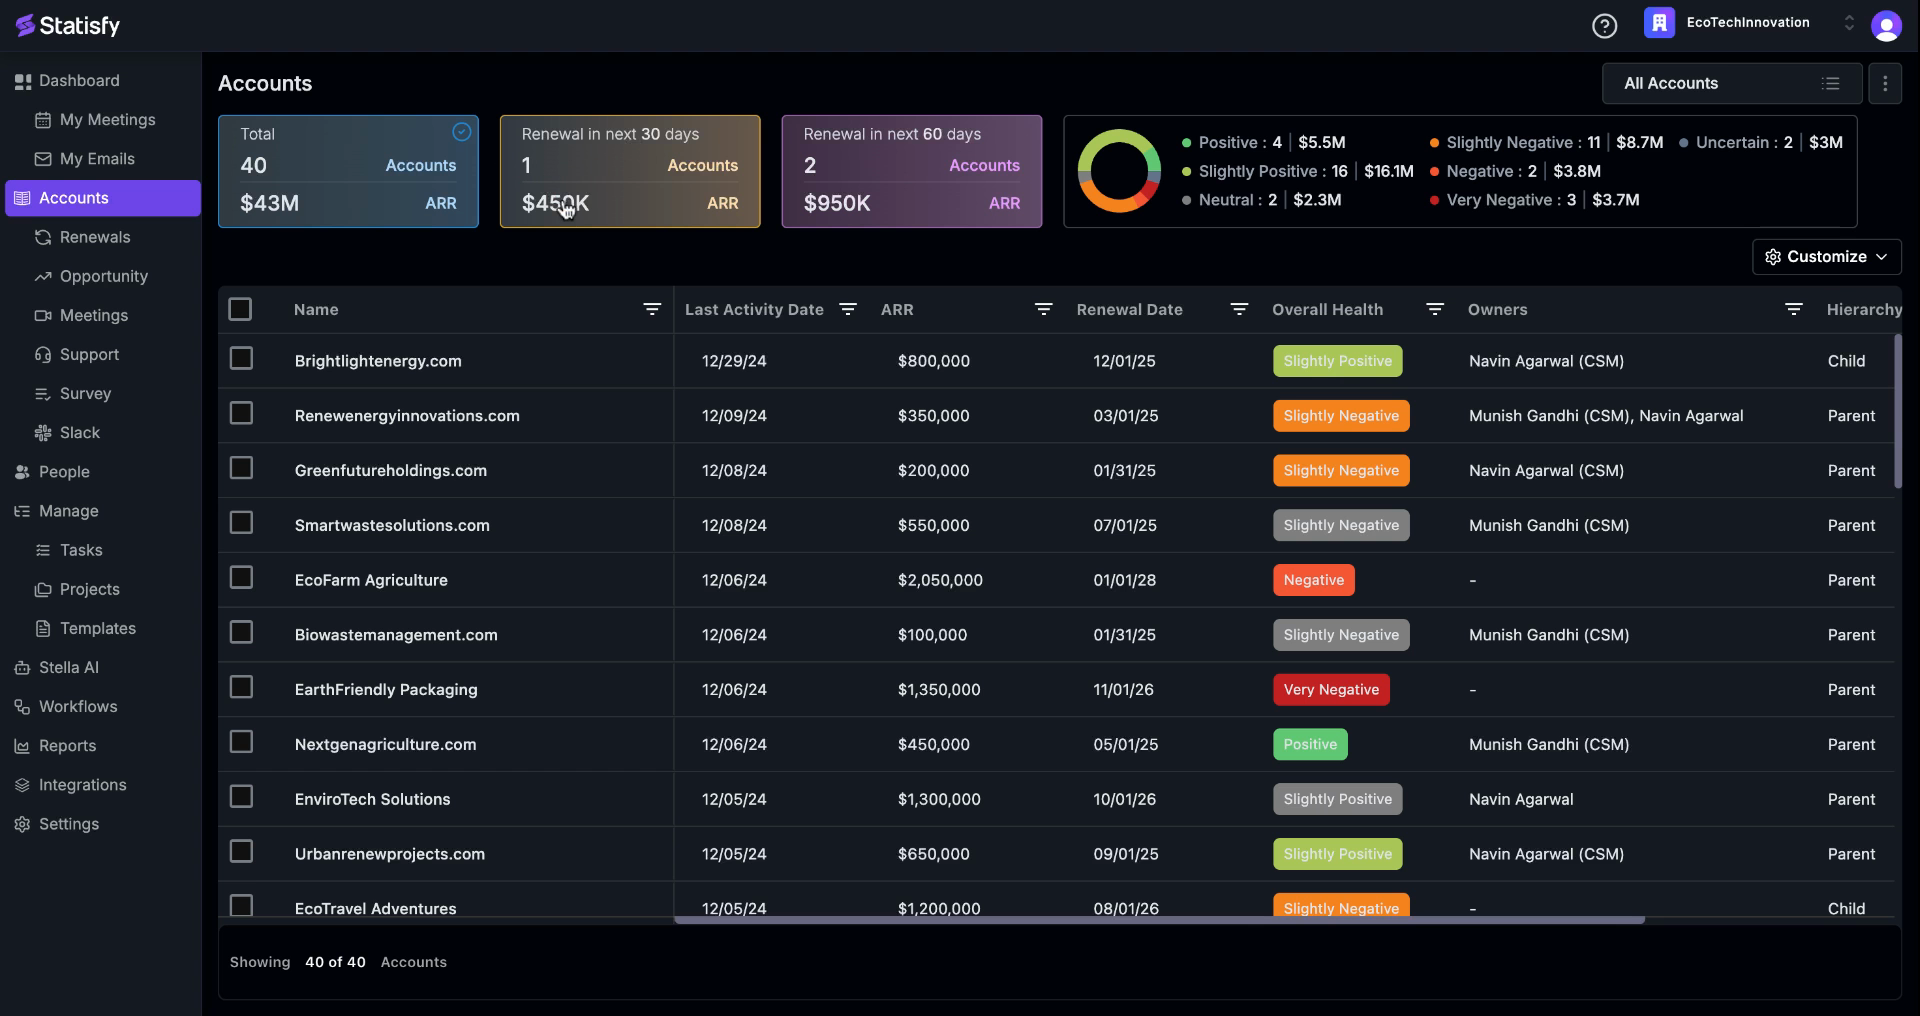 Step 4: Similarly, you’ll find the number of accounts due for renewal in the next 60 days and their ARR. The bottom of the page displays the total number of accounts shown on the page. If there are more than 100 accounts, the first 50 to 100 will be displayed on this page. To view accounts due for renewal in the next 30 days, click on the corresponding tab.
 Step 5: The system will then filter and display all accounts falling under the 30-day renewal category. To view accounts due for renewal in the next 60 days, click on the corresponding tab.
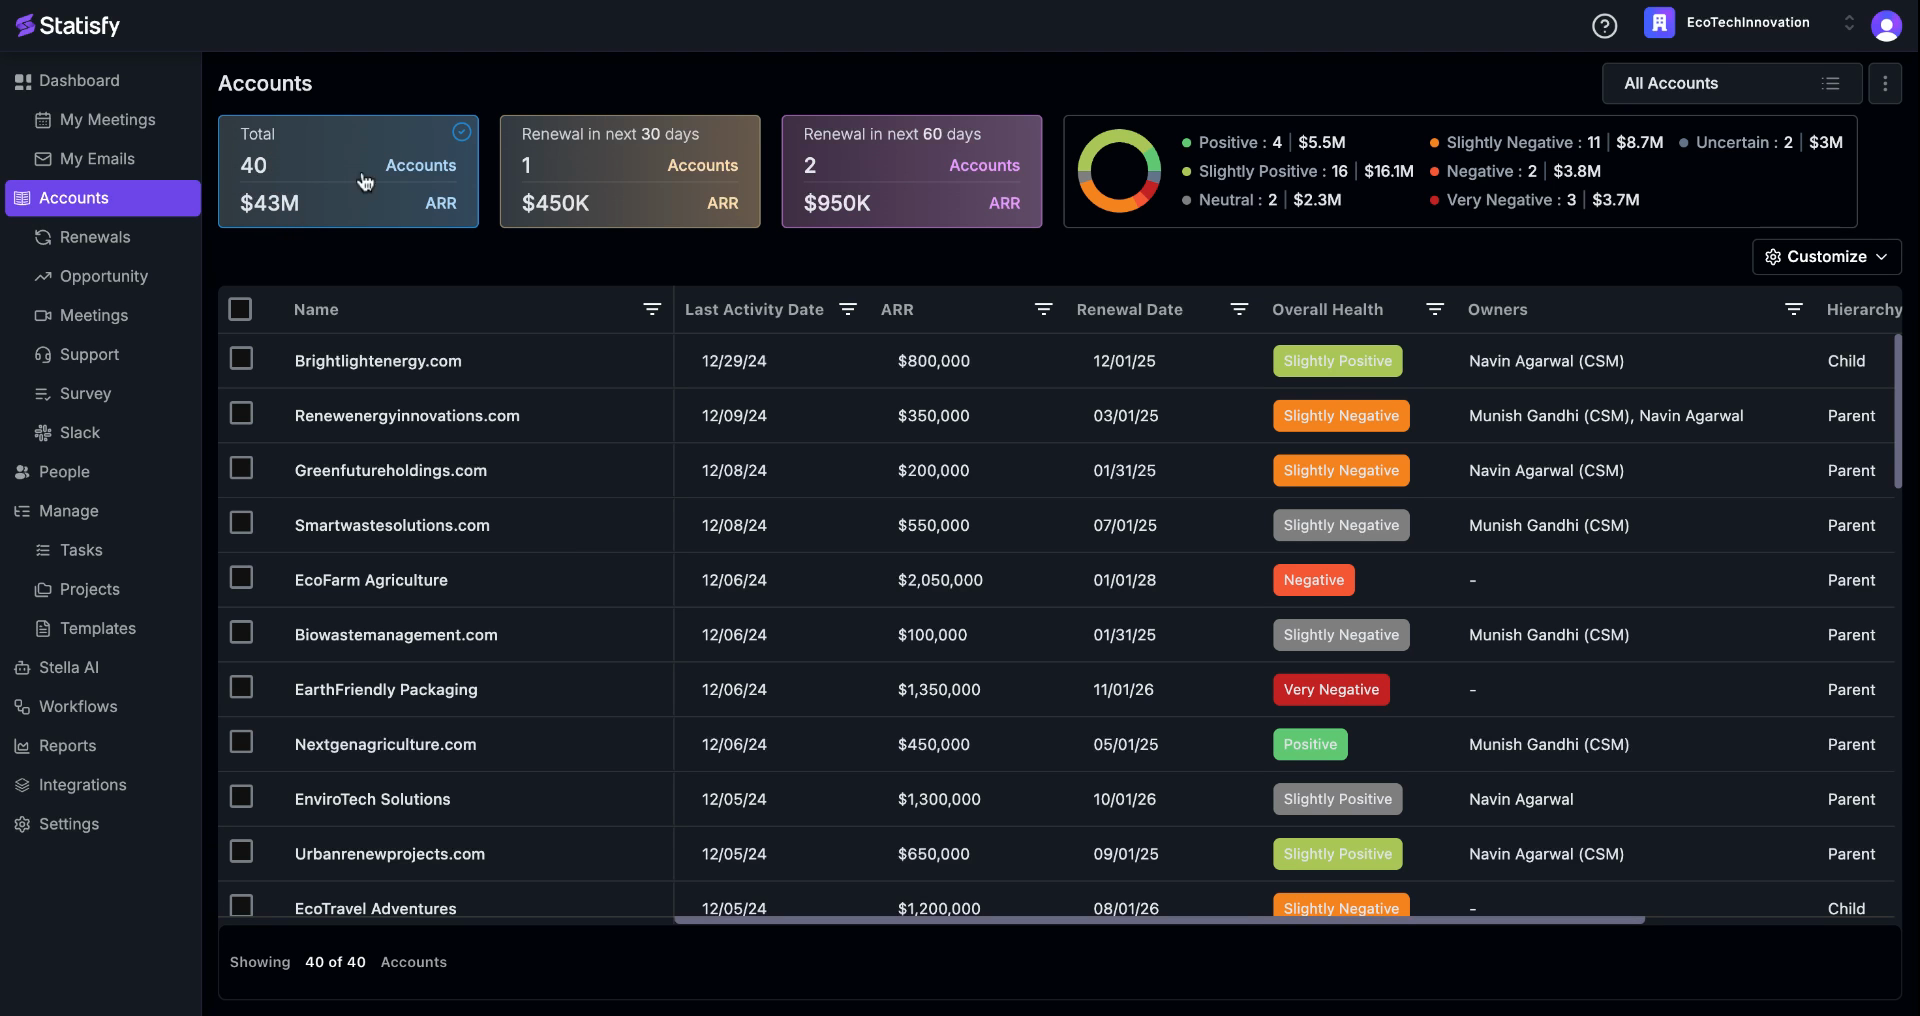
 Step 6: The system will filter and display all accounts falling under the 60-day renewal category. Click on “Total” to view the total number of accounts.
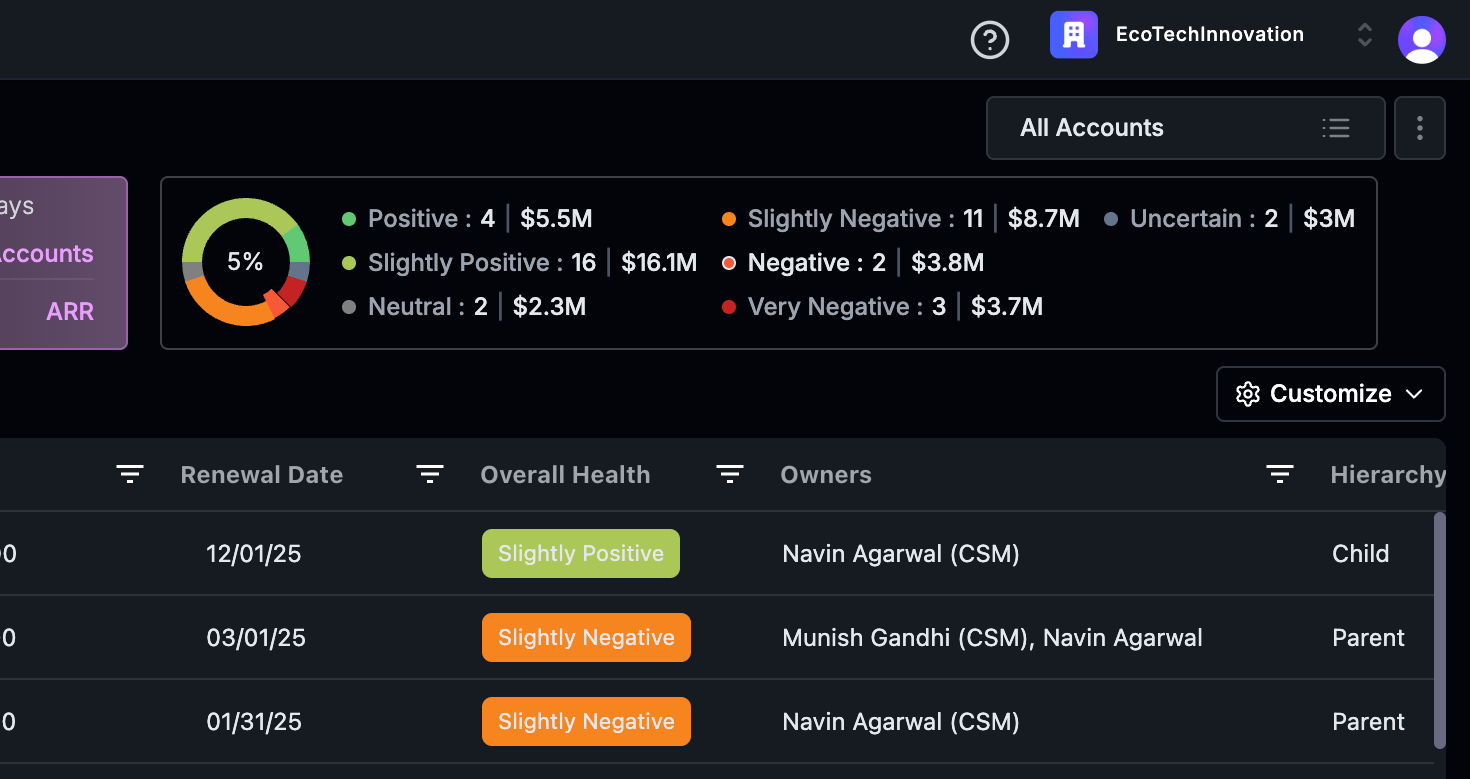
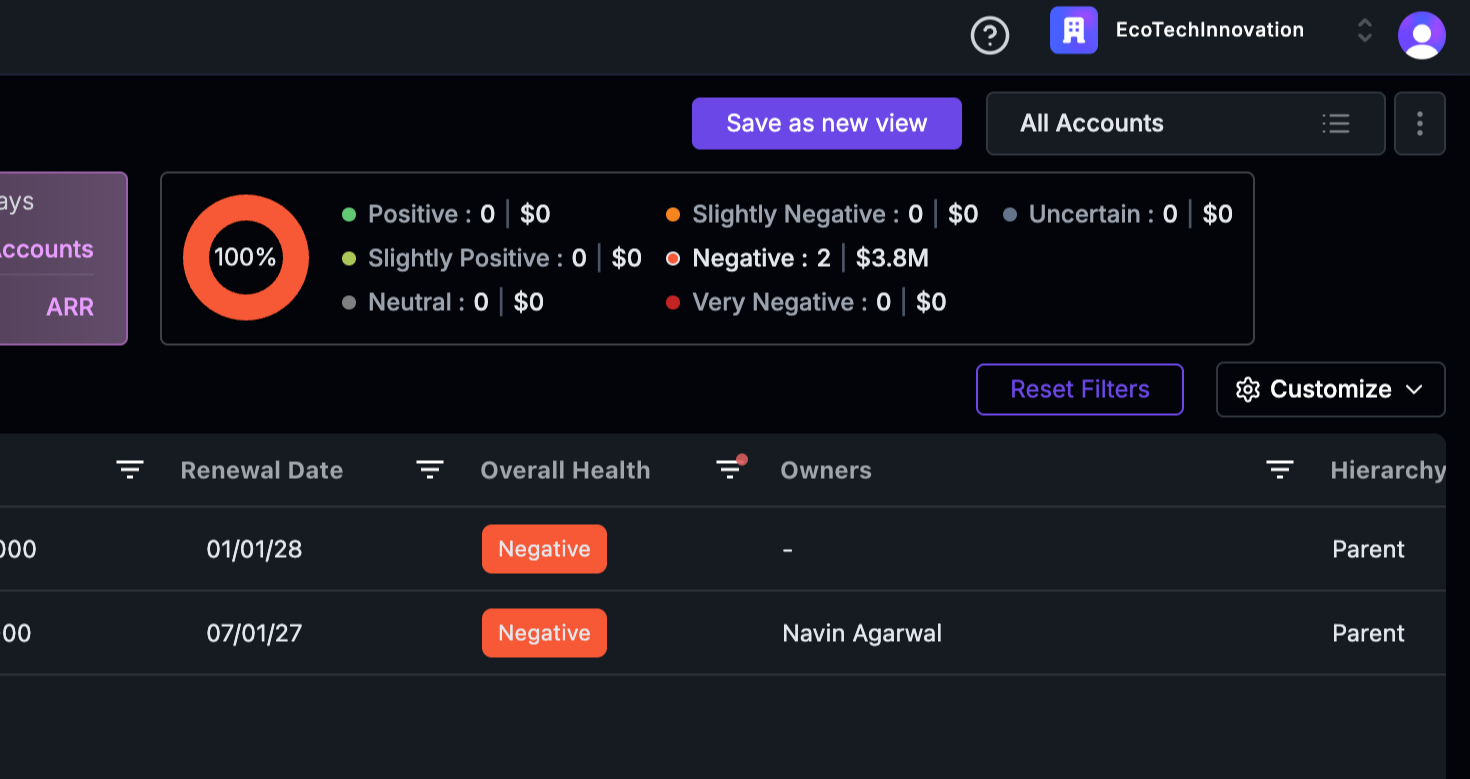
 Step 7: If you want to view only the accounts in a negative state, click on “Negative”. The system will filter accordingly.
 Step 8: To undo the filter, click on the same option again.
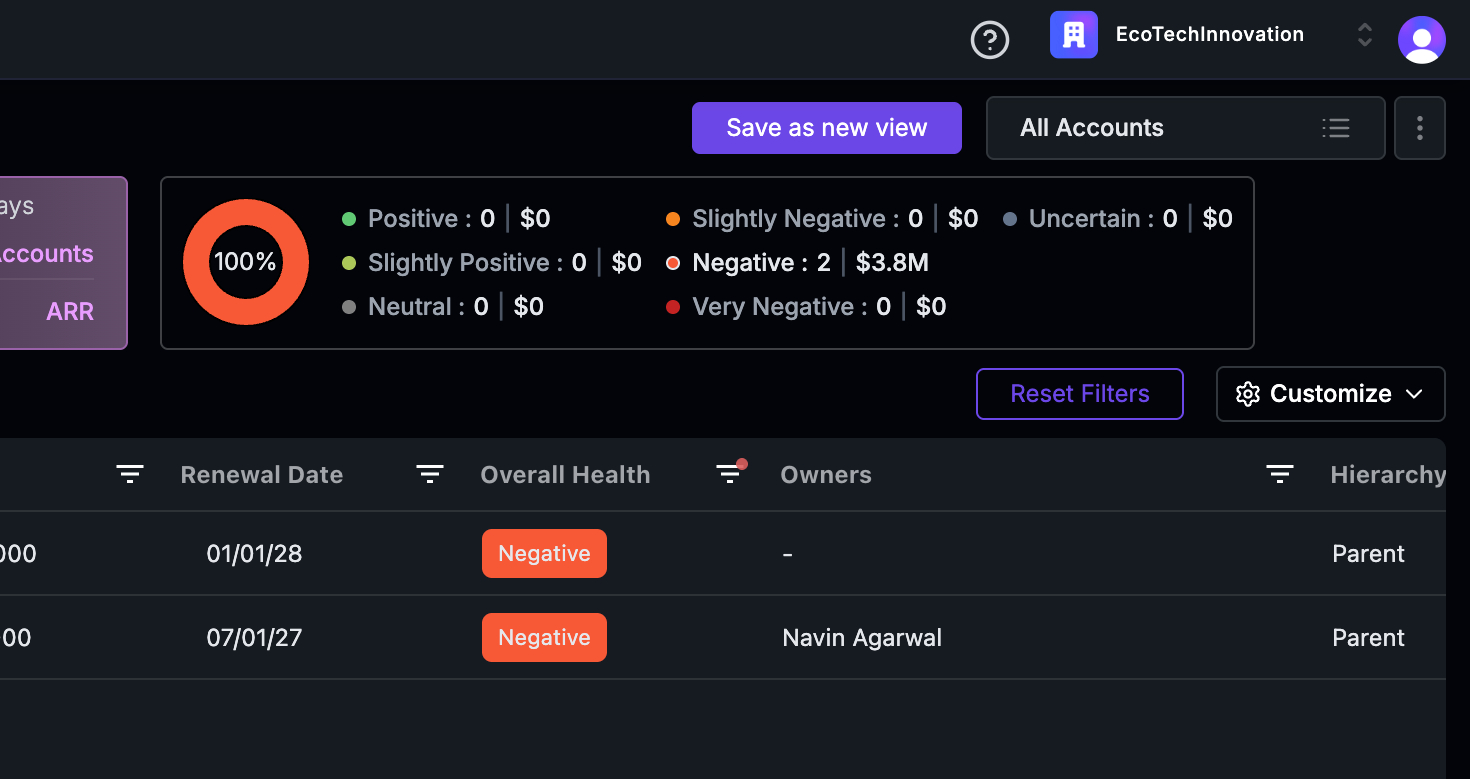 Step 9: Alternatively, you can close the filter or click on “Reset Filters” to return to the original page view.
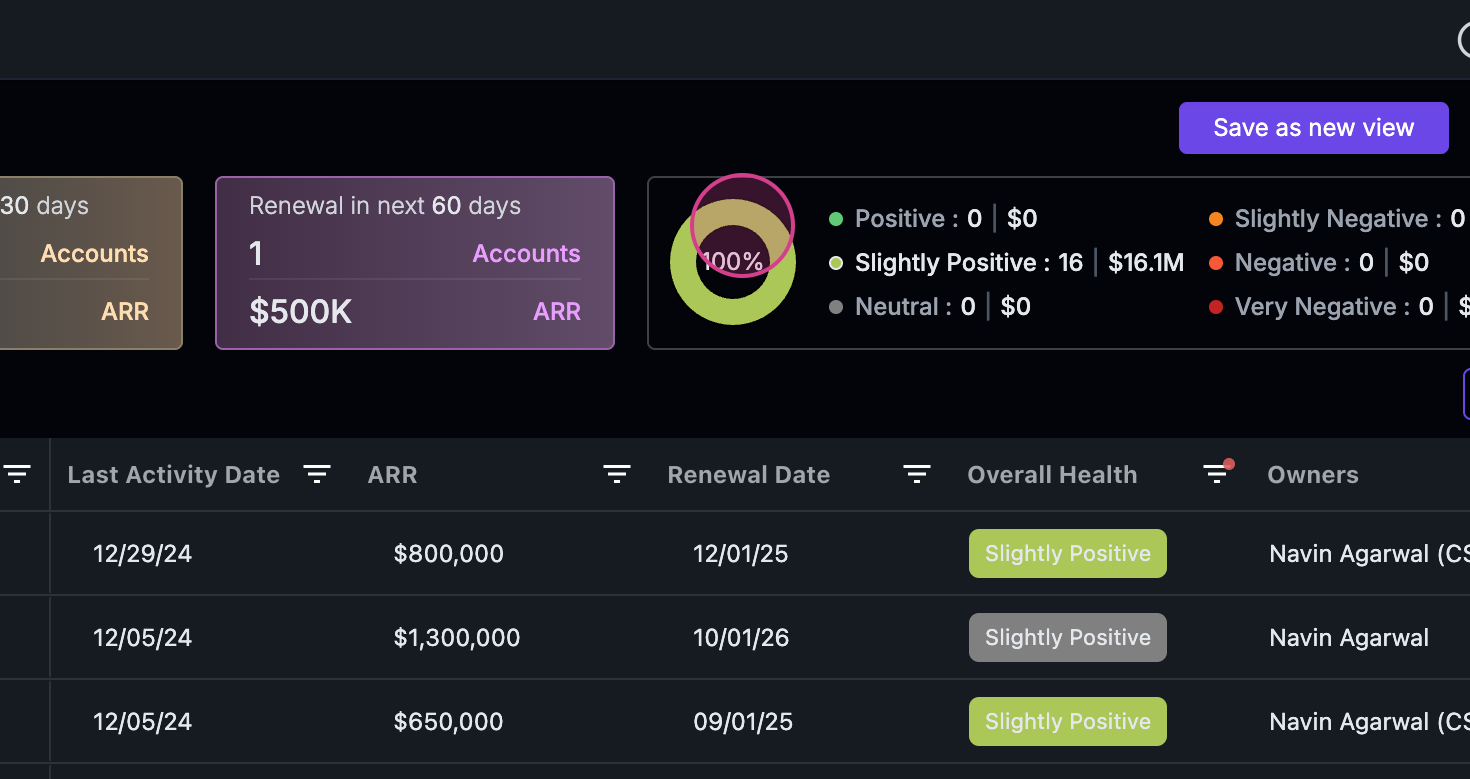
 Step 10: To view accounts in a slightly positive state, simply click on the corresponding option.
 Step 11: The system will filter and display the relevant accounts.
 Step 12: Click on the pie chart or the name displayed to filter the view below and obtain the data you need.
 That’s all there is to it! You’re now equipped to navigate and apply filters in the admin view. Thank you!