Prerequisites
- An existing project open in the Manage > Projects section
- At least two sibling tasks (tasks sharing the same parent) to create dependencies between
- To use auto-cascade, enable it via the Customize dropdown in the project header (see Enabling Auto-Cascade)
How Dependencies Work
A dependency is a “blocked by” relationship between two tasks. If Task B depends on Task A:- Task A is the blocker (must finish first)
- Task B is the dependent (waits for the blocker)
- Task B’s start date is always at least one day after Task A’s due date
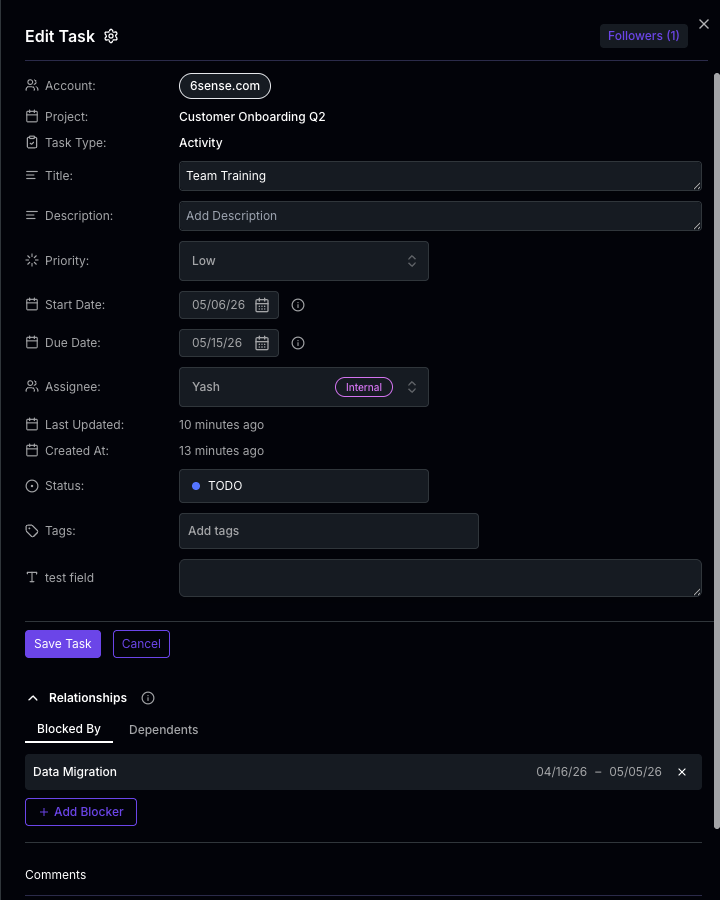
Adding and Removing Dependencies
- Open a task by clicking on it in the project task grid
- Scroll to the Relationships section
- Use the Blocked By tab to add tasks that must finish before this one
- Use the Dependents tab to see which tasks are waiting on this one
- To remove a dependency, click the remove icon next to the linked task
Dependency Constraints
Not all tasks can be linked. The following rules are enforced:| Constraint | Description |
|---|---|
| Same project | Both tasks must belong to the same project |
| Same parent | Both tasks must share the same parent — only sibling tasks can be linked |
| No self-dependency | A task cannot depend on itself |
| No circular chains | Circular references (e.g., A blocks B, B blocks C, C blocks A) are prevented |
Auto-Cascade Dates
Auto-cascade dates is a per-project setting that controls whether date changes propagate automatically through your task structure. When enabled, you don’t need to manually adjust every task when the schedule shifts.Enabling Auto-Cascade
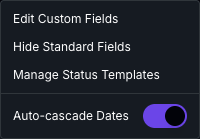
- Open your project
- Click the Customize dropdown in the project header
- Toggle Auto-cascade Dates on
What Happens When Dates Change
With auto-cascade enabled, date changes propagate through five scenarios. Each scenario can trigger the others, creating a complete cascade through your project.Project start date change
Project start date change
When you change the project’s start date, all task dates shift by the same number of days. Both start dates and due dates move together, preserving every task’s duration.Example: Moving the project start from January 1 to January 6 shifts every task forward by 5 days.Before you save, a shift indicator below the start date field shows how many days tasks will move (e.g., “Tasks will be shifted forward by 5 days”). The project’s due date also shifts by the same amount automatically.
Task start date change (shifts subtasks)
Task start date change (shifts subtasks)
When you change a task’s start date, all of its subtasks shift by the same delta. Both start and due dates move together, preserving each subtask’s duration. This applies recursively — grandchildren shift by the same amount.Example: If a parent task’s start date moves forward by 3 days, all subtasks and their children also move forward by 3 days.
Blocker due date change (recalculates dependents)
Blocker due date change (recalculates dependents)
When a blocker task’s due date changes, each dependent task recalculates its start date:
- New start date = latest blocker due date + 1 day
- Duration is preserved — the due date shifts by the same amount as the start date
Bubble-up to parent tasks
Bubble-up to parent tasks
When any child task’s end date changes — whether from a direct edit or a cascade — the parent task’s end date automatically adjusts to match its latest child. This continues up the parent chain.At each level, if the parent’s end date changes, its sibling dependents are also recascaded.Example: A parent task has three subtasks ending on Jan 5, Jan 8, and Jan 10. If the Jan 10 subtask shifts to Jan 15, the parent’s end date updates to Jan 15. If the parent has dependents, those are recalculated too.
Project end date sync
Project end date sync
After all task cascades complete, the project’s due date updates automatically to reflect the latest task end date across all tasks.
Duration Preservation
Auto-cascade always preserves task duration. When a task’s start date shifts, its due date shifts by the same amount — the number of days between them stays the same.
Visual Feedback
When a cascade occurs after saving a task:- Affected rows flash briefly in the task grid to highlight which tasks changed
- A toast notification shows the cascade count (e.g., “Task updated successfully. 4 dependent tasks updated.”)
Info Tooltips
When editing a task that belongs to a project, you’ll see info tooltips next to the date fields:- Start Date (cascade enabled): “Changing this date will move all subtasks by the same amount. The parent task’s end date will automatically adjust to match its latest subtask.”
- Due Date (cascade enabled): “Changing this date will update tasks that depend on this one. Their parent tasks will also adjust to match, which may shift other related tasks.”
- Both fields (cascade disabled): “This task is part of a project. Enable auto-cascade dates to automatically keep related task dates in sync.”
When Cascade Is Disabled
With auto-cascade turned off, changing a task’s dates only affects that single task. No subtasks, dependents, or parent tasks are updated. You are responsible for keeping all dates consistent manually.
Dependencies in Project Templates
Project templates support dependencies using relative day offsets instead of fixed dates:- Start From (days) — number of days after the project start date when the task begins (e.g., 0 = project start, 5 = five days later)
- Duration (days) — how many days the task lasts from its start date
 When auto-cascade is enabled in a template, changing a template task’s dates cascades through the template’s dependency graph. The template’s overall duration also updates automatically to match the latest task end date.
Related Pages
Milestones & Task Hierarchy
Learn about task depth limits, milestones, and subtask structure
Reorder & Reparent Tasks
Use drag and drop to reorder and restructure tasks
Project Template Creation
Create reusable project templates with predefined tasks
Editing Tasks
Edit task details, dates, and add comments