

What You Can Build
Customer Portals
Branded pages that surface the right information to your customers, built from a starting template.
Embedded Experiences
Pages that authenticate against Statisfy with your developer keys to show live, account-specific data.
The Portal Lifecycle
- Create — Start a new portal from a template and give it a name.
- Build — Customize the portal in Portal Studio, the in-browser editor: edit its code and configure its components (for example, point a Digital Worker chat at the right worker). Code edits are saved automatically as a draft; component settings are saved explicitly with Save changes.
- Preview — Build your draft and deploy it to a preview URL to review before you publish. A preview URL is not password-protected — anyone with the link can open it, so treat it as unlisted rather than private.
- Go live — Promote the previewed version to your live, customer-facing URL, which you can open and share. Going live (and changing a portal’s address) needs the manage portals permission, which admins and builders have.
Accessing Portals
Open the Portals page at app.statisfy.com/portals to see all of your portals, create new ones, and open the editor. Portals is in Alpha and isn’t in the main sidebar yet, so reach it by URL. Each portal appears as a card showing its name and current status.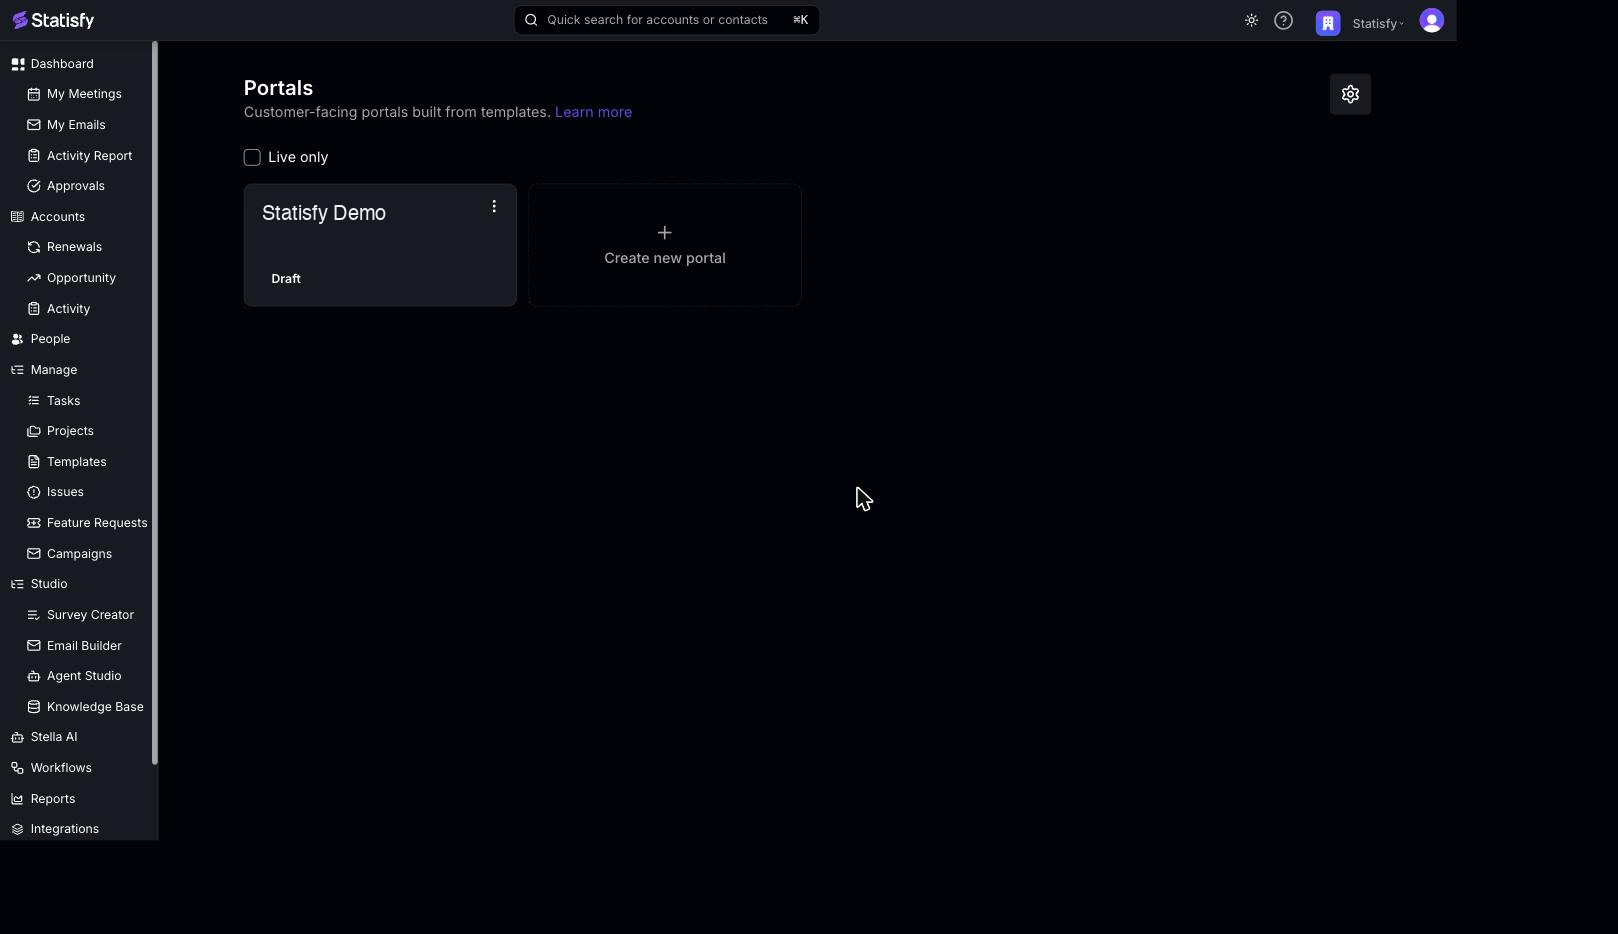 Use the Live only checkbox at the top of the list to filter what’s shown. Either way, an archived portal that’s still live keeps appearing (with an Archived badge) — only an archived portal that’s also been taken offline drops out of the list entirely, since there’s nothing left to manage:
- Unchecked (the default) — every draft and live portal, including any archived portal that’s still live. Offline archived portals are not shown.
- Live only — only portals that are currently live, including a live portal that’s been archived (still with its Archived badge), so you can spot a live site that was archived without being taken offline.
Portal Statuses
Archiving never takes a portal offline on its own. If you want an archived portal to stop serving, choose Also unpublish when you archive it (see Building & Publishing).
Developer Keys & Embedding
Portals that display live, account-specific data authenticate with Statisfy using your publishable key and a secret. You manage these from the Developer Keys panel — open it with the gear icon on the Portals page (it’s the same set of keys available under Settings → API keys).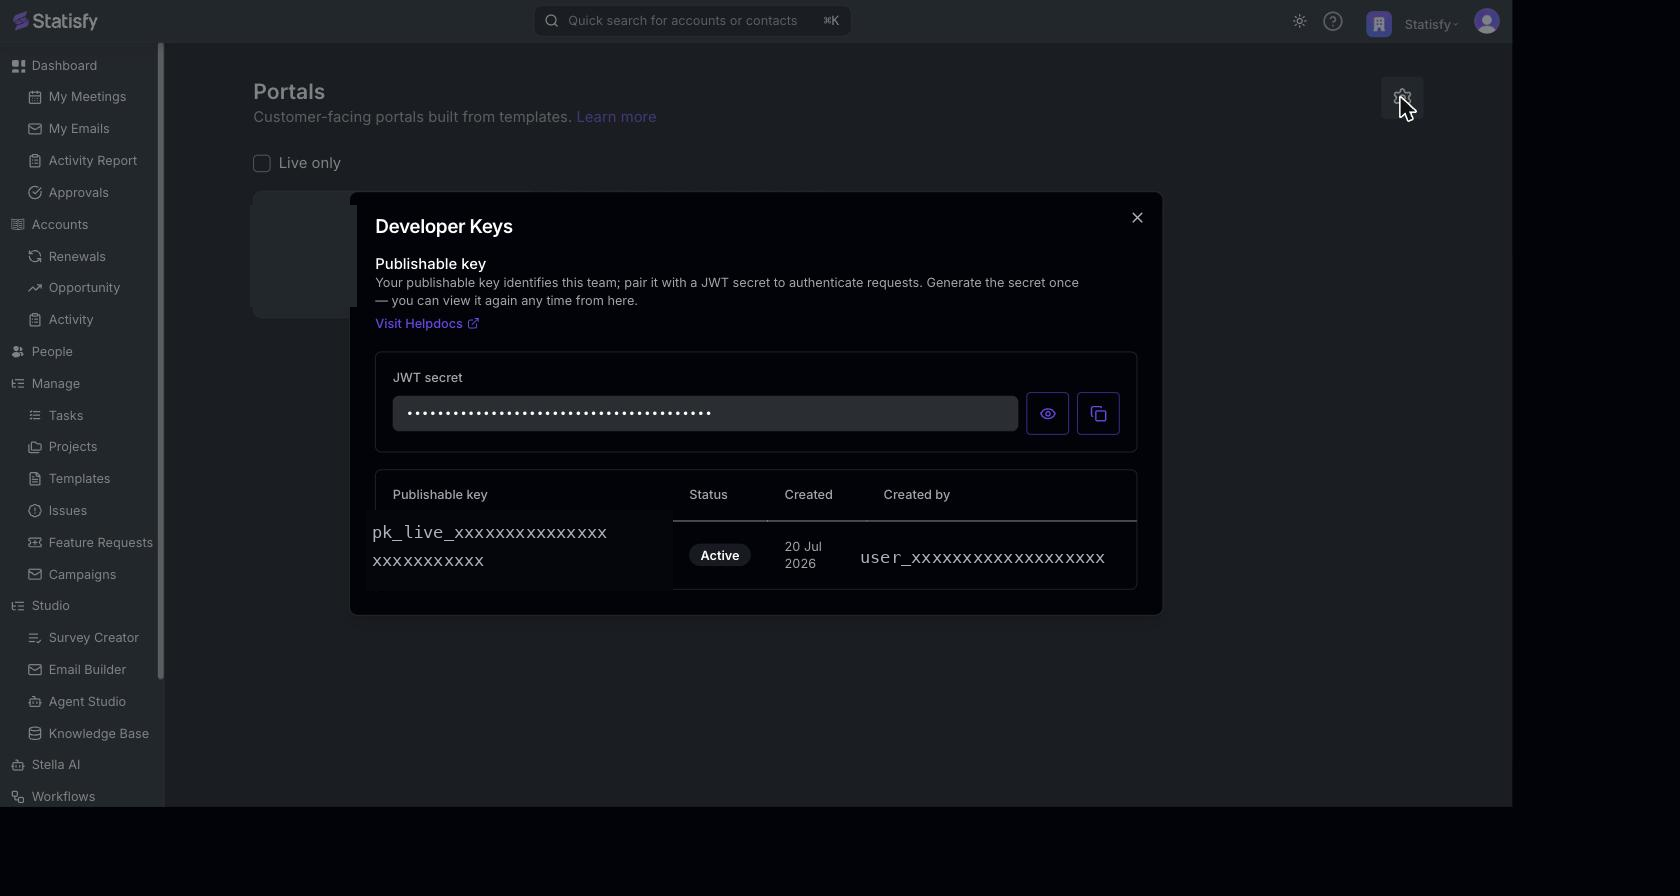 For how the key/secret pair works, how to mint and rotate secrets, and how to sign requests, see Publishable Keys & Secrets.
Customer Sign-In
Every portal ships with a passwordless sign-in screen: a visitor enters their email address and Statisfy emails them a one-time code. Only people who already exist in Statisfy can sign in. The email address must match a person on an account in Statisfy. If it doesn’t, Statisfy sends no code and shows no error — the screen behaves exactly as it does for a recognized address, because leaking who is or isn’t a customer would be an enumeration risk. The code’s lifetime, the sender, and the email’s content are all configurable per portal — see Customizing the Login Email. A contact who belongs to several accounts signs in once and can then switch between them; the session is re-minted per account, so a portal only ever shows one account’s data at a time.API & SDK
Beyond the no-code editor, portals — and your own apps — can read and write live Statisfy data through the Statisfy SDK (@statisfy/portal-react and @statisfy/ai-react) and its REST API. Sign-in comes first; every call after it carries your publishable key and the short-lived session token sign-in returned:
The SDK wraps these in React components (a Digital Worker chat and an onboarding Project module) and headless clients. Full guides and the complete reference:
SDK Overview
What the SDK is, architecture, and the authentication model.
Getting Started
Install, mint a session token, and render your first component.
Digital Worker Chat
Chat components, inline forms, and the headless client.
Project Module
Show and update a customer’s onboarding project.
API Reference
Endpoints, headers, SSE frames, error codes, and TypeScript types.
Portal Address
When you go live, you choose the subdomain your portal is served at on Statisfy’s managed portal domain — in production that’scustomer.site, so a portal ends up at something like acme.customer.site. The dialog shows the exact suffix it will append. You set this under Settings → Domains in the editor; leave it blank to get an auto-generated address. See Building & Publishing for details.
Preview URLs live on a different domain (
statisfy.app) from live portals (customer.site), so the address you review at is never the address you publish at.What You’ll Need
- A template to start from (shown when you create a portal)
- A developer key — required to create a portal, and what authenticates embedded, account-specific data
- The right permissions for what you’re doing:
- Creating, editing, and previewing a portal — anyone on your team
- Going live, rolling back, archiving, and adding or removing a portal’s address — the manage portals permission (admins and builders)
- Component settings (Settings → Components) and the login email (Auth tab) — the same manage portals permission; without it those panels are read-only
Next Steps
- Creating a Portal — Start a new portal from a template
- Building & Publishing — Customize, publish, and manage your portal
- Portal SDK: Project API — Read and update a customer’s onboarding project from a portal
- Portal MCP Server — Let an AI assistant read, edit, validate, and preview your portals
- Publishable Keys & Secrets — Authenticate embedded portal experiences
- Statisfy SDK & API — Embed Digital Worker chat and live project data with the SDK