> ## Documentation Index
> Fetch the complete documentation index at: https://help.statisfy.com/llms.txt
> Use this file to discover all available pages before exploring further.
# How To Set Up Your Customer Portals
> Create a portal, customize it, wire it to your customers' data, and take it live — including who is allowed to sign in.
**Portals is in Alpha and isn't in the main sidebar yet.** Go straight to [app.statisfy.com/portals](https://app.statisfy.com/portals) — it's worth bookmarking. Anyone on your team can open it.
### Setup at a Glance
| # | Step | Who can do it | Where |
| - | -------------------------------------------- | --------------------------------- | ------------------------------------------------------------ |
| 1 | Create your portal from a template | Anyone on your team | [app.statisfy.com/portals](https://app.statisfy.com/portals) |
| 2 | Customize it | Anyone on your team | Portal Studio, or Claude |
| 3 | Point each account at its onboarding project | Anyone who can edit customer data | The account's **Onboarding Project** field |
| 4 | Set up who can sign in | Anyone who can edit customer data | **Accounts → People** |
| 5 | Preview and go live | Admin or Builder | Portal Studio |
Steps 1–2 and 5 happen once per portal. Steps 3–4 happen once per **account** you onboard, so they keep going as you add customers.
### Step 1: Create Your Portal From a Template
Open the **Portals** page at [app.statisfy.com/portals](https://app.statisfy.com/portals) and select **Create new portal**. Pick a template — select **Live preview** on a template card to see what it looks like first — give the portal a name, and select **Create portal**. Statisfy opens it in Portal Studio.
Full walkthrough: [Creating a Portal](/portals/creating_a_portal).
A new portal starts as a **Draft**. Nothing is customer-facing until you go live in [Step 5](#step-5-preview-and-go-live).
### Step 2: Customize It
Portal Studio is the in-browser editor. Two things matter for setup:
* **Code** — your portal's files, built with React and TypeScript. Edits autosave as a draft, so the live version never changes underneath you.
* **Settings → Components** — where you tell each ready-made Statisfy component *which* data or worker it should use. Unlike code, these need an explicit **Save changes**.
The editor in full — tabs, version history, and rollback — is covered in [Building & Publishing](/portals/building_and_publishing).
#### Customizing With Claude
You don't have to edit the code by hand. Statisfy has a **Portal MCP server**, so Claude (or another MCP client) can work on a portal directly: list your portals, read and edit files, validate the changes, and deploy a preview URL for you to review.
Connect it once — add a custom connector pointing at `https://api.statisfy.com/mcp/portal` and authorize it — then ask in plain language:
> *"Change the welcome heading on the Acme portal and give me a preview link."*
Edits go to your **draft**, and the assistant can build and deploy a **preview**. It cannot publish to your live site: going live stays a human action in Portal Studio. Setup, the full tool list, and troubleshooting: [Portal MCP Server](/portals/portal_mcp_server).
### Step 3: Point Each Account at Its Onboarding Project
If your portal shows a customer their onboarding project — the **Project module** — it doesn't guess which project that is. It reads a field on the account.
Every account in Statisfy already has a built-in **Onboarding Project** field: a **Lookup – Project** field that names the one project this account's portal should show. Until you set it, a customer can sign in perfectly well and still find the project area empty.
#### Setting it
You don't need a portal permission for this — it's an ordinary account edit, so any team member who can edit customer data can do it. Note that a **Member** only sees the accounts in their own book; **Member All Accounts**, **Builder**, and **Admin** see every account.
Open the account, find **Onboarding Project**, search for the project by name, and select it. To point many accounts at their projects at once, use bulk edit — select the accounts, choose the field, and link them. The mechanics are the same as any other lookup field; see [Lookup Fields](/custom-fields/lookup_fields).
**You probably shouldn't do this by hand for every account.** A [project template automation](/projects/project_template_automations) can create the onboarding project from a template *and* fill in this field automatically whenever an account matches conditions you set — so a new customer's portal works the moment they sign in, with nobody remembering to link anything.
#### How the portal uses it
* **Once per account, not once per portal.** When a customer signs in, the portal reads the field on *their* account. One field per account serves every portal you build, so there's nothing to wire up per portal.
* **The Project module reads it automatically.** In Portal Studio this appears as a **Locked** property under **Settings → Components** — Statisfy resolves it per signed-in customer, which is why it's read-only there and why you don't need to configure it.
* **It's also the boundary.** A portal only ever shows the project the signed-in customer's own field points at, so one account's project can't surface on another's portal.
An empty **Onboarding Project** field is the most common reason a portal loads correctly but its project area shows nothing. Check the field on the account before you start debugging the portal itself.
### Step 4: Set Up Who Can Sign In
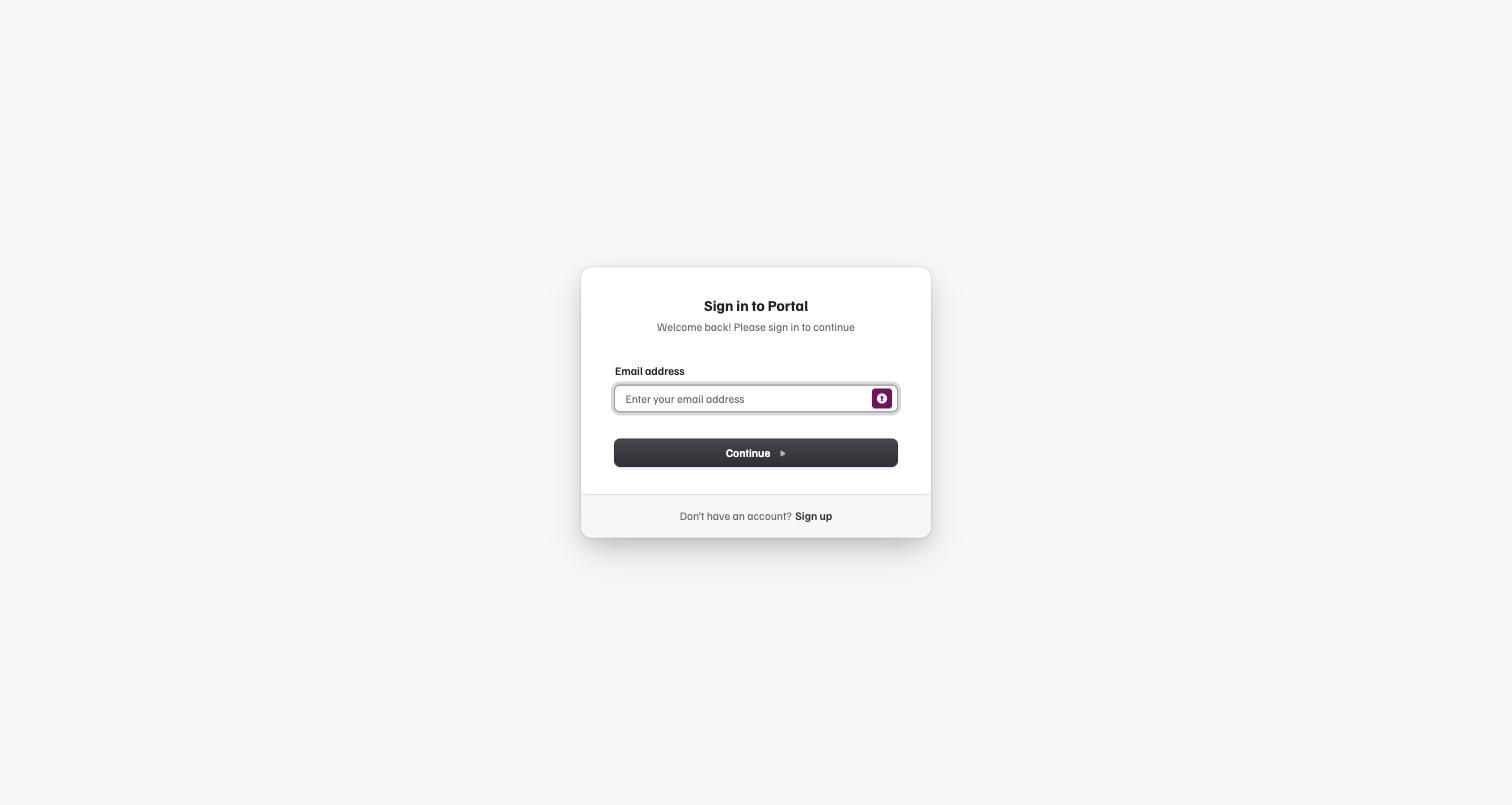
This is the step that's easiest to miss: a portal doesn't have its own user list. **Anyone who signs in must already exist in Statisfy as a person on an account.**
Adding that contact is an ordinary customer-data edit — no portal permission needed, and any team member who can edit customer data can do it (a **Member** for the accounts in their own book).
**To give a customer access, make sure they are a contact on the account whose data they should see.** That contact record is what binds their portal session to one account — every piece of data the portal shows is scoped to it.
#### What a customer experiences
1. They open your portal and enter their email address.
2. Statisfy emails them a 6-digit code, valid for as long as you set on the **Auth** tab (1–60 minutes, default 10).
3. They enter the code and land in the portal, signed in and scoped to their account.
They stay signed in across reloads without re-entering a code, for up to 30 days of continued use.
**One active session per portal, per person.** Signing in on a new device ends that contact's earlier session on the same portal — they'll be asked to sign in again on the old one.
#### Contacts on more than one account
A contact can be attached to several accounts — one primary plus any number of secondary associations. If a portal's template includes the **account switcher**, that contact sees a picker naming the account they're viewing and can switch between the accounts they hold; switching re-scopes everything on the page to the account they chose.
The switcher only ever offers accounts the contact actually holds — it can't be used to reach another customer's data — and a contact on exactly one account sees a plain label rather than a picker.
#### What to check before you invite customers
Open the account and confirm the person is listed, with the exact email address they'll type at sign-in.
The address on the contact record and the address they enter must be the same. A typo isn't a distinct error — no code is sent at all (see below).
In Portal Studio, use **Preview as** on the **Preview** tab to pick that account and person, and see the portal exactly as they will. This one needs the *manage portals* permission, since it signs you in as that customer.
**A wrong or unknown email address fails silently — on purpose.** If the address isn't a contact in Statisfy, the sign-in screen still says the code was sent, but nothing is emailed. This is deliberate: it stops the sign-in page from being used to test whether someone is your customer. So "I never got the code" almost always means the contact record is missing or the address doesn't match.
### Step 5: Preview and Go Live
Taking a portal live is two deliberate moves, so nothing reaches a customer unreviewed:
Select **Preview link** in the editor header. When your draft has edits that aren't built yet, the popover offers **Build a new link from your draft** — Statisfy saves your draft, builds it, and deploys it to a preview address; your live site does not change. Builds usually finish in a minute or two, and the popover then shows the link with **Copy** and **Open**. Anyone on your team can do this.
When the preview looks right, someone with the *manage portals* permission — an **Admin** or **Builder** — publishes it. The **first** time, open **Settings → Domains → Add domain**. Enter a **subdomain** (lowercase letters, numbers, and hyphens) to serve the portal at `your-subdomain.customer.site`, or leave it blank for an auto-generated address — then select **Go Live**. After that, each new version goes live from **Make live…** in the editor header.
Component settings reach your live portal at your next **Go live**, together with your code — so if you changed them in Step 2, go live again to ship them.
#### See It the Way Your Customers Do
Once the portal is live, the surest check is to sign in to it yourself, as a customer would. Nothing about it is simulated — it's the real portal, on the real URL, with real account data.
Open any account and add yourself as a person on it, using an email address you can receive mail at. This is the same thing you'd do for a real customer ([Step 4](#step-4-set-up-who-can-sign-in)) — the contact record is what lets an address sign in at all.
Go to your portal's URL, enter that email address, and select the option to send a code. Statisfy emails you a 6-digit sign-in code; enter it.
Not sure of the URL? Open the portal in Portal Studio and check **Settings → Domains**, which lists every address it's served at. The **Go live** control in the editor header also shows the current live address.
If you've added yourself to more than one account and your template includes the account switcher, choose the account you want to inspect.
What you're looking at is exactly what a customer on that account sees — their onboarding project, their chat, their data, and nothing from any other account. Add yourself to a second account and switch to compare.
**This is the live portal, so anything you do in it is real.** A comment you post from the portal is shared with the customer, and a task you complete is genuinely completed. Use an account you're comfortable touching — a test account is safer than a real customer's.
Want to check a customer's view *before* going live, or without adding yourself anywhere? Use **Preview as** on the **Preview** tab in Portal Studio, which renders the draft against a real account and person. It needs the *manage portals* permission; signing in to the live portal only needs a contact record and an inbox, so it's the option you can hand to anyone.
Remember to remove yourself from the account afterwards if you don't want to stay on it — a contact record is ordinary customer data and shows up wherever contacts do.
#### Who can do what
Building a portal needs no special role — anything that changes what your **customers** can reach does.
Everything that changes what your **customers** see sits behind one permission — *manage portals*, held by the **Admin** and **Builder** roles. Everything before that is open to your whole team.
| What you're doing | Who can do it |
| -------------------------------------------------------------------- | ----------------------------------------------------------------------------------- |
| Open **Portals**, create a portal, edit it, and deploy a **preview** | Anyone on your team |
| **Go live**, roll back, and add or remove the portal's address | Admin or Builder |
| **Archive** a portal, and take it offline with it | Admin or Builder — without the permission the **Archive** action isn't shown at all |
| Configure **components** (Settings → Components) | Admin or Builder — the panel is read-only without it |
| Change the **login email** (Auth tab) | Admin or Builder — the form is editable for anyone, but saving fails without it |
| **Preview as** a specific customer | Admin or Builder — it signs you in as that customer |
So a builder owns a portal end to end: author it, ship it, retire it. Nothing here is admin-only.
Rollback, version history, and archiving are covered in [Building & Publishing](/portals/building_and_publishing). To change someone's role, see the [User Management and Roles Guide](/admin/user_management_and_roles_guide).
## Advanced
Neither of these is needed to get a portal working — add them when you want them.
### Add a Digital Worker Chat
If your portal includes the **Chat** or **Onboarding** component, it needs a **Digital Worker** to answer your customers. A portal doesn't come with one — you create the worker separately, then point the component at it.
Go to **Digital Workers**, create a worker, and set its persona, knowledge bases, and guardrails. Full reference: [Configuring a Digital Worker](/digital-workers/configuring_a_worker).
Only **Active** workers can serve a portal. A **Draft** or **Archived** worker isn't offered in the picker, and a portal that references one fails to build.
On the worker's **Portal** tab, enable the channel and set the required **Acknowledgement message** — what a customer sees when a reply is held for human approval.
Open **Settings → Components**, choose the worker for the **Chat** (or **Onboarding**) component, and select **Save changes**. Saved settings show in your preview right away and reach the live portal at your next **Go live**.
Which component needs what:
| Component | What it needs before it works |
| -------------- | -------------------------------------------------------------------------------------------------------------------------------------------- |
| **Chat** | An active Digital Worker |
| **Onboarding** | An active Digital Worker **and** the account's **Onboarding Project** field ([Step 3](#step-3-point-each-account-at-its-onboarding-project)) |
A component you haven't configured shows a placeholder instead of its content — for example, *"This chat isn't configured yet."* Configure every component under **Settings → Components** before you go live. If you pick a worker and later set it to **Draft** or **Archived**, the next build of that portal fails rather than shipping a chat that can't answer.
**The chat picks its own onboarding project.** It uses the customer's most recent project created from a template whose name contains "onboarding" and that still has an open task — not the account's **Onboarding Project** field. Point that field at the same project so the chat and the project view are talking about the same work.
Don't see **Digital Workers** in your navigation? The nav row needs the **Admin** role, and the feature has to be turned on for your organization — contact your administrator or [Statisfy support](mailto:support@statisfy.com).
### Brand the Sign-In Email
Out of the box, Statisfy sends a clean built-in sign-in email and your customers can sign in straight away. To send it from **your own** address instead, that domain has to be verified for sending first.
1. Go to **Settings → DNS**, enter your domain, and select **Add domain**.
2. Have your IT or DNS admin publish the generated DKIM and mail-server records at your DNS provider.
3. Select **Verify** in Statisfy. Propagation can take a few hours.
Full walkthrough, including how to check a record before you click **Verify**: [DNS Setup](/admin/dns_setup).
Once the domain is verified, set the sender, subject, body, and code lifetime per portal on the **Auth** tab in Portal Studio — see [Customizing the Login Email](/portals/building_and_publishing#customizing-the-login-email-auth-tab).
Statisfy rejects a sender address on an unverified domain when you save the Auth tab. A good pattern once verified is `login@your-domain.com`.
### Setup Checklist
* [ ] A **JWT developer key** has been generated
* [ ] Every Statisfy **component in the portal is configured**
* [ ] An **active Digital Worker** exists with its **Portal** channel on (only if the portal has a Chat or Onboarding component)
* [ ] Each account's **Onboarding Project** field points at the right project (only if the portal shows a project)
* [ ] Each customer exists as a **person on the account** they should see, with the exact email they'll use
* [ ] Someone with the *manage portals* permission — an **Admin** or **Builder** — is on hand for the go-live (building and previewing need no special role)
* [ ] The portal has been **previewed and taken live** at a subdomain
* [ ] A **sending domain is verified** (only if you want a branded sign-in email)
### Troubleshooting
You don't have a developer key yet — this is the publishable key and JWT secret Statisfy uses to wire a portal to live data. Select **Generate key** next to the button to create one without leaving the dialog, or generate a JWT secret under **Settings → API keys**. You only do this once; every portal afterwards reuses the same key. See [Publishable Keys & Secrets](/admin/publishable_keys).
Almost always the address isn't a contact in Statisfy, or it doesn't match the contact record exactly. Statisfy answers the sign-in screen the same way either way and sends nothing — see [Step 4](#step-4-set-up-who-can-sign-in). Check the account's people list, then have them try again. If the record is correct, check your spam folder and confirm your sending domain is still verified under **Settings → DNS**.
Their email resolved to no person on any account — usually because the contact was removed or moved after they last signed in. Re-add them as a contact on the right account.
Both need the *manage portals* permission — the **Admin** or **Builder** role. They fail differently, which is worth knowing: **Archive** simply isn't offered (the **⋮** menu is hidden on the card, and the Danger zone says you don't have permission), while **Make live…** stays clickable and fails with a permission error, so a failure there usually means your role rather than a broken build. Editing and previewing need no special role, which is why the rest of the editor still works. See [Who can do what](#who-can-do-what).
The address is on a domain that isn't verified for sending. Verify it under **Settings → DNS** first — see [Brand the Sign-In Email](#brand-the-sign-in-email) — or leave the sender blank to use the Statisfy default.
No worker is chosen for that component, or the chosen worker is no longer **Active**. Check the worker's status under **Digital Workers**, then pick it again under **Settings → Components** and go live. See [Add a Digital Worker Chat](#add-a-digital-worker-chat).
That account's **Onboarding Project** field hasn't been set. Open the account, set the field to the customer's project, and have the customer sign in again — no rebuild or go-live is needed, because the field is read at sign-in. See [Step 3](#step-3-point-each-account-at-its-onboarding-project). If this keeps happening for new customers, set up a [project template automation](/projects/project_template_automations) so the field is filled in for you.
It hasn't been configured. Open **Settings → Components** in Portal Studio, set its properties (for example, choose the Digital Worker for a chat), select **Save changes**, then go live again — component settings reach the live portal only at your next go-live.
### Next Steps
* [Portals Overview](/portals/overview) — Lifecycle, statuses, developer keys, and portal addresses
* [Creating a Portal](/portals/creating_a_portal) — Start a new portal from a template
* [Building & Publishing](/portals/building_and_publishing) — The editor, versions, going live, and archiving
* [Portal MCP Server](/portals/portal_mcp_server) — Let Claude edit your portal and deploy a preview
* [Configuring a Digital Worker](/digital-workers/configuring_a_worker) — Create and activate the worker your portal chats with
* [Lookup Fields](/custom-fields/lookup_fields) — Set the account's **Onboarding Project** field
* [Project Template Automations](/projects/project_template_automations) — Create the onboarding project and fill that field automatically
* [DNS Setup](/admin/dns_setup) — Verify a sending domain for the sign-in email
* [Publishable Keys & Secrets](/admin/publishable_keys) — Generate and rotate your developer key