> ## Documentation Index
> Fetch the complete documentation index at: https://help.statisfy.com/llms.txt
> Use this file to discover all available pages before exploring further.
# Portals Overview
> Build, customize, and publish customer-facing portals from templates.
Portals let you build customer-facing web experiences on top of your Statisfy data — without standing up your own front end. You start from a template, customize it in an in-browser editor, and publish it to a live, Statisfy-hosted URL your customers can visit.
### What You Can Build
Branded pages that surface the right information to your customers, built from a starting template.
Pages that authenticate against Statisfy with your developer keys to show live, account-specific data.
### The Portal Lifecycle
1. **Create** — Start a new portal from a template and give it a name.
2. **Build** — Customize the portal in **Portal Studio**, the in-browser editor: edit its code and **configure its components** (for example, point a Digital Worker chat at the right worker). Your changes are saved automatically as a draft.
3. **Preview** — Deploy your draft to a preview URL and review it before any customer sees it.
4. **Go live** — Promote the previewed version to your live, customer-facing URL, which you can open and share.
You can keep editing a live portal at any time — new edits stay in your draft until you go live again, so the live version never changes unexpectedly. See [Building & Publishing](/portals/building_and_publishing) for the full editor and publishing walkthrough.
### Accessing Portals
Open the **Portals** page to see all of your portals, create new ones, and open the editor. Each portal appears as a card showing its name and current status.
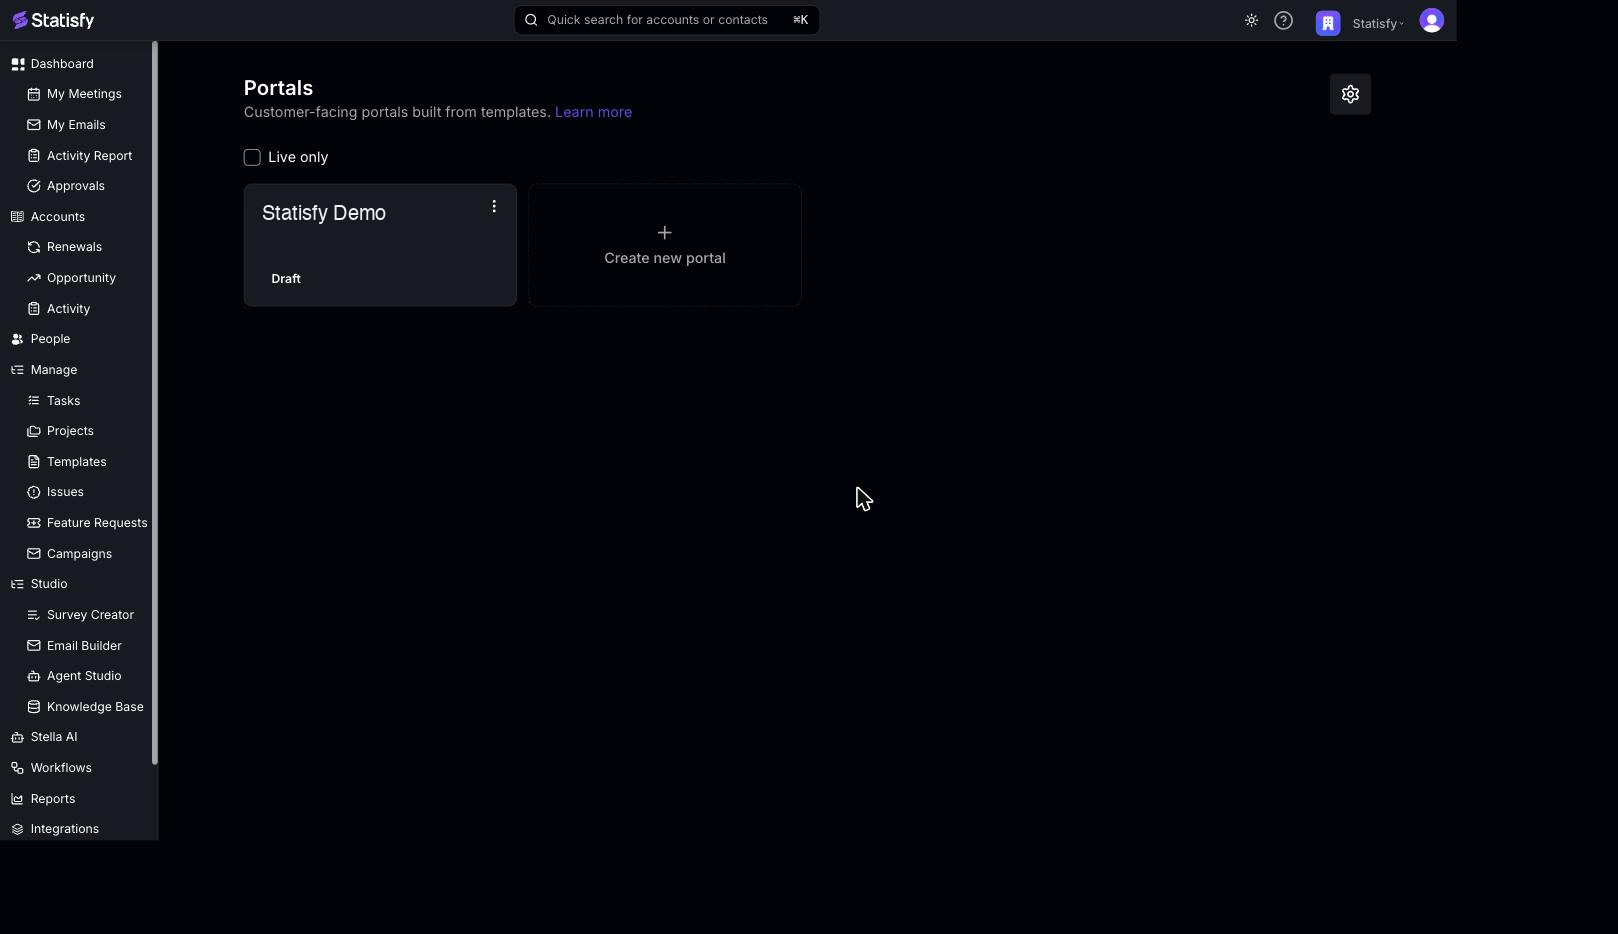
Use the **Live only** checkbox at the top of the list to filter what's shown. Either way, an archived portal that's still live keeps appearing (with an **Archived** badge) — only an archived portal that's also been taken offline drops out of the list entirely, since there's nothing left to manage:
* **Unchecked** (the default) — every draft and live portal, including any archived portal that's still live. Offline archived portals are not shown.
* **Live only** — only portals that are currently live, including a live portal that's been archived (still with its **Archived** badge), so you can spot a live site that was archived without being taken offline.
### Portal Statuses
| Status | Meaning |
| ------------ | ------------------------------------------------------------------------------------------------------------------------------------------------------------------------------------------------------------------------------------------------------------------------------------------------------------------------------------------------ |
| **Draft** | The portal has been created or edited but has not been published yet. It has no live URL. |
| **Live** | The portal has been published and is being served at its live URL. |
| **Archived** | The portal has been archived (a recoverable soft-delete) and **can't be edited**. If it was also unpublished, it's removed from the list entirely. Otherwise its live site keeps serving and it stays in the list — even with **Live only** checked — carrying an **Archived** badge, so a portal can be both **Live** and **Archived** at once. |
Archiving never takes a portal offline on its own. If you want an archived portal to stop serving, choose **Also unpublish** when you archive it (see [Building & Publishing](/portals/building_and_publishing)).
### Developer Keys & Embedding
Portals that display live, account-specific data authenticate with Statisfy using your workspace's **publishable key** and a **secret**. You manage these from the **Developer Keys** panel — open it with the gear icon on the Portals page (it's the same set of keys available under **Settings → API keys**).
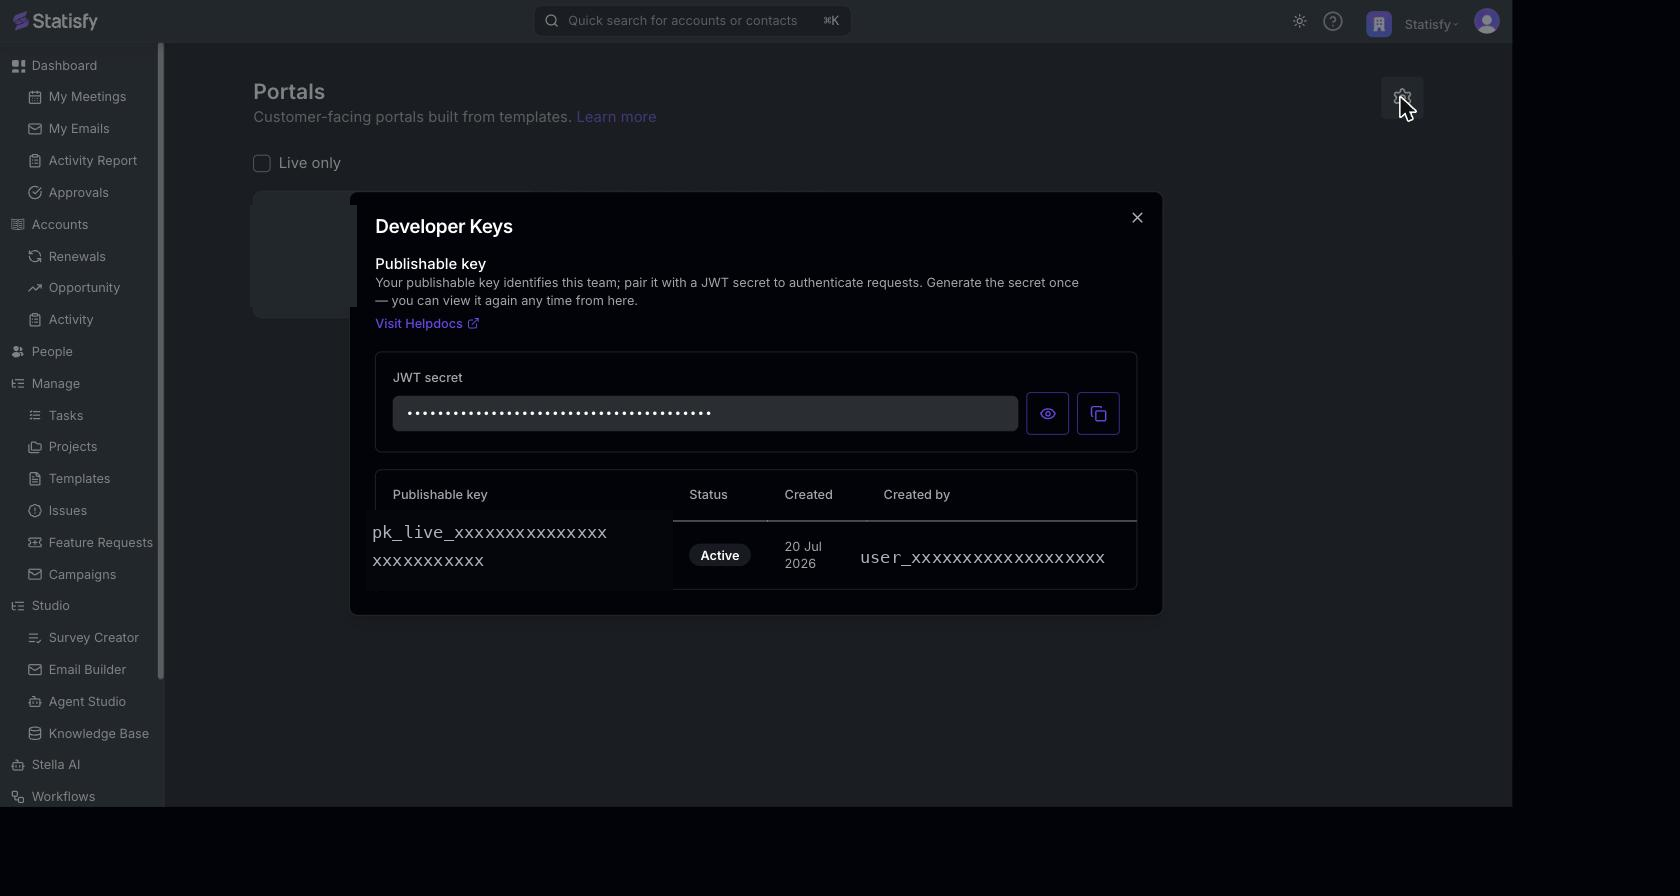
For how the key/secret pair works, how to mint and rotate secrets, and how to sign requests, see [Publishable Keys & Secrets](/admin/publishable_keys).
Sign tokens with your secret on your **backend only**. The publishable key is safe to ship in client-side code; the secret must never be exposed in a browser. See [Publishable Keys & Secrets](/admin/publishable_keys) for details.
### API & SDK
Beyond the no-code editor, portals — and your own apps — can read and write live Statisfy data through the **Statisfy SDK** (`@statisfy/digital-workers-react`) and its REST API. You authenticate with your [publishable key and a short-lived session token](/admin/publishable_keys), then call the gateway:
| Area | Endpoints |
| ----------------------- | --------------------------------------------------------------------------------------------------------------------------------------- |
| **Auth** | `POST /sdk/auth` — exchange a signed-in user's identity for a session token |
| **Projects** | `GET /sdk/v1/config/{module}`, `GET /sdk/v1/projects/{id}`, `PATCH /sdk/v1/projects/{id}`, `PATCH /sdk/v1/projects/{id}/tasks/{taskId}` |
| **Digital Worker chat** | `POST /sdk/dw/v1/workers/{id}/messages` (and `/messages/stream`), `GET …/conversation`, `GET …/conversations` |
The SDK wraps these in React components (a Digital Worker chat and an onboarding Project module) and headless clients. Full guides and the complete reference:
What the SDK is, architecture, and the authentication model.
Install, mint a session token, and render your first component.
Chat components, inline forms, and the headless client.
Show and update a customer's onboarding project.
Endpoints, headers, SSE frames, error codes, and TypeScript types.
### Portal Address
When you go live, you choose the **subdomain** your portal is served at on Statisfy's domain — for example, `acme.statisfy.app`. You set this in the **Go live** dialog or under **Settings → Domains** in the editor; leave it blank to get an auto-generated address. See [Building & Publishing](/portals/building_and_publishing#choosing-your-portals-address) for details.
### What You'll Need
* Permission to manage portals in your workspace
* A template to start from (shown when you create a portal)
* A [developer key](/admin/publishable_keys) for your workspace — required to create a portal, and what authenticates embedded, account-specific data
### Next Steps
* [Creating a Portal](/portals/creating_a_portal) — Start a new portal from a template
* [Building & Publishing](/portals/building_and_publishing) — Customize, publish, and manage your portal
* [Publishable Keys & Secrets](/admin/publishable_keys) — Authenticate embedded portal experiences
* [Statisfy SDK & API](/sdk/overview) — Embed Digital Worker chat and live project data with the SDK