> ## Documentation Index
> Fetch the complete documentation index at: https://help.statisfy.com/llms.txt
> Use this file to discover all available pages before exploring further.
# Surveys
> Build NPS, CSAT, and custom surveys, distribute them, and analyze responses.
Surveys let you collect structured feedback from your customers and measure sentiment over time. Build a survey once, distribute it through a [campaign](/campaigns/creating_campaigns), and review aggregated results in survey analytics.
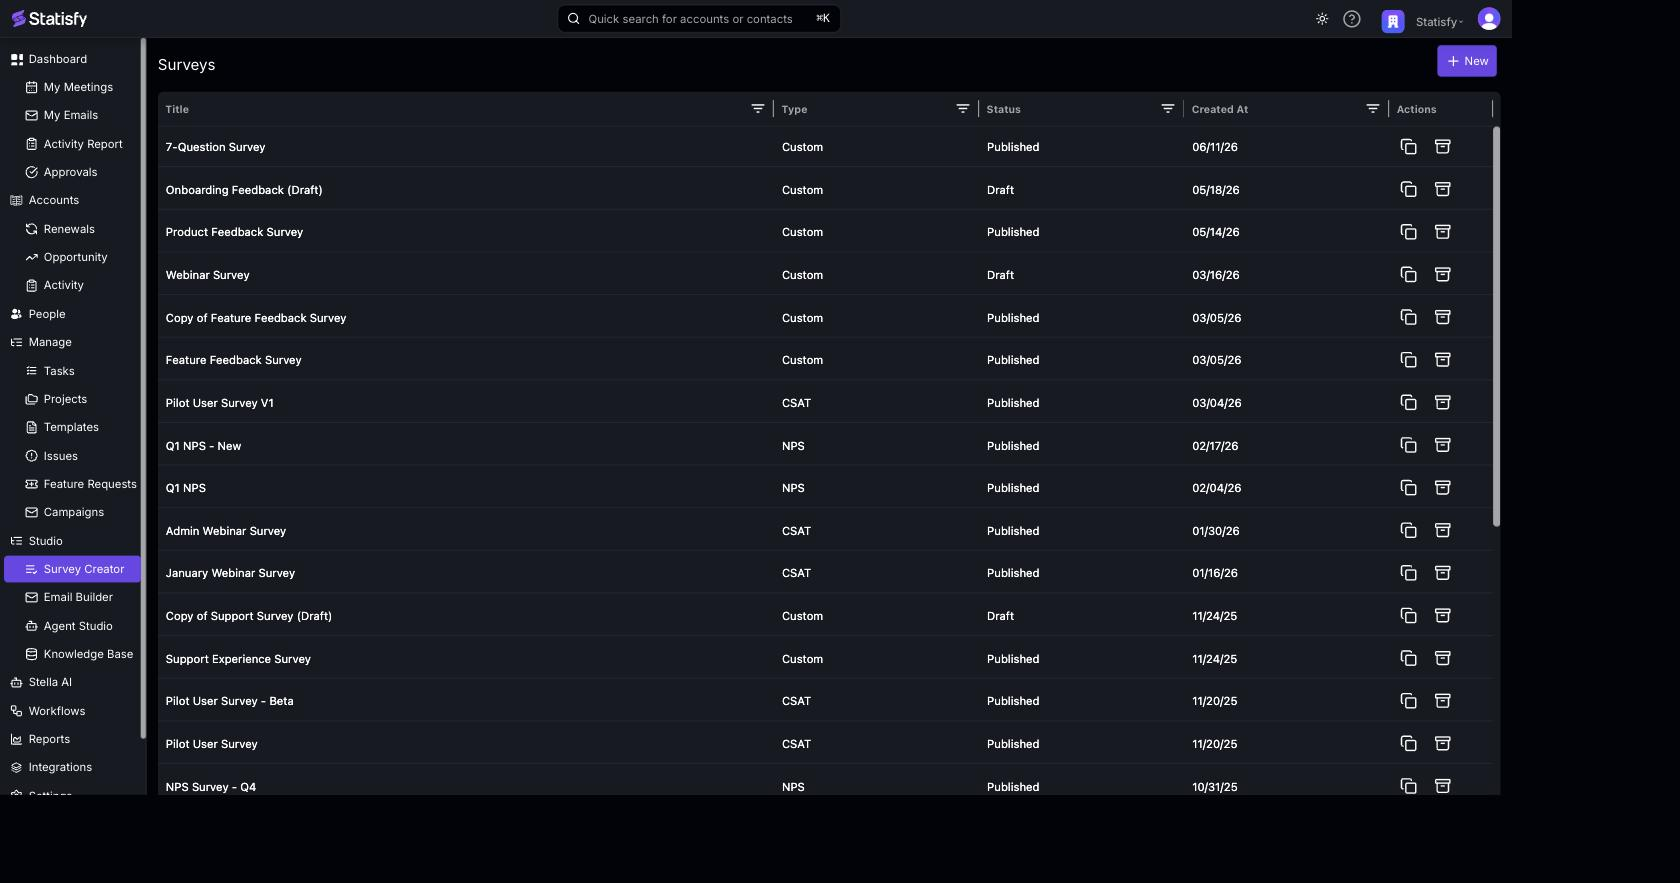
Open the survey builder from **Survey Creator** in the sidebar, or directly at **[app.statisfy.com/survey-creator](https://app.statisfy.com/survey-creator)**. The list shows each survey's title, type, status, and creation date.
### Survey Types
Choose a type when you create a survey. The type sets up the right question structure for the metric you want to measure.
| Type | Measures | Typical question |
| ---------- | -------------------------------------------------------- | -------------------------------------------- |
| **NPS** | Net Promoter Score — loyalty and likelihood to recommend | "How likely are you to recommend us?" (0–10) |
| **CSAT** | Customer Satisfaction | "How satisfied are you with...?" |
| **Custom** | Anything — fully custom questions | Any combination of question types |
For **Custom** surveys, the visual builder lets you add your own questions — text fields, ratings, single- and multi-select choices, dropdowns, and more — and arrange them across one or more pages, with logic and theming.
### Survey States
| State | Description |
| ------------- | ------------------------------- |
| **Draft** | Editable work in progress. |
| **Published** | Locked and ready to distribute. |
Published surveys cannot be edited. This keeps responses consistent for everyone who receives the survey. If you need to change a published survey, duplicate it and edit the copy.
### Building a Survey
The survey builder has two tabs, **Survey** and **Email**.
#### Survey tab
1. Click **New** and give the survey a **Survey Title** (and optional description).
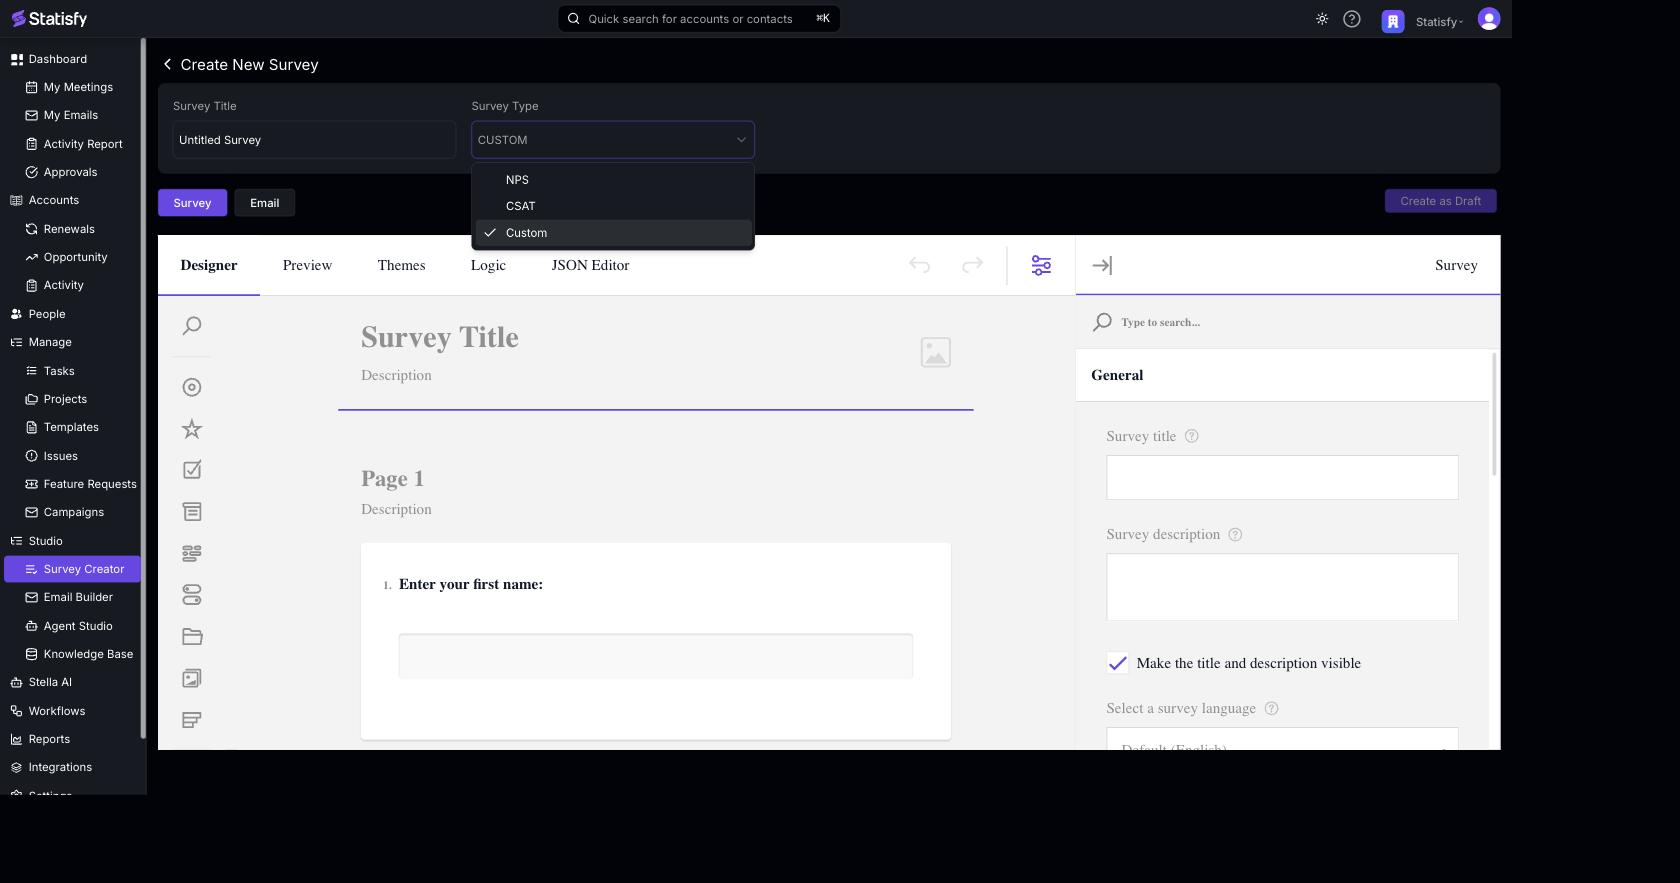
2. Pick a **Survey Type** — **NPS**, **CSAT**, or **Custom**.
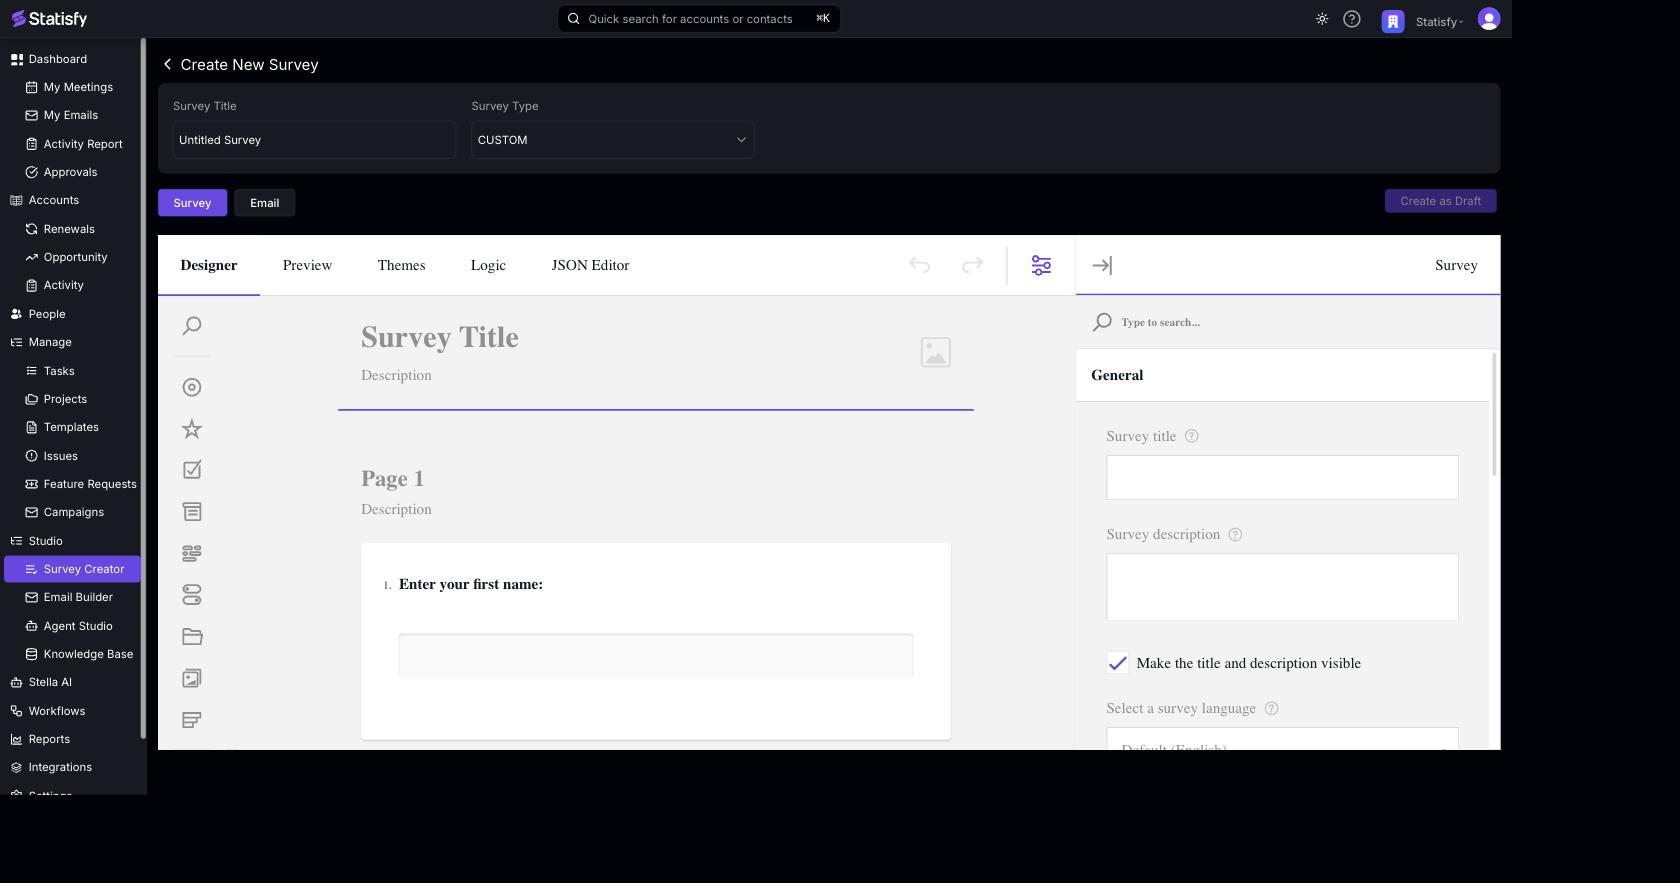
3. Design your questions in the visual Designer:
* For NPS and CSAT, Statisfy sets up the standard scale for you.
* For Custom surveys, use the visual question designer to add and order questions, add page logic, and apply a theme.
#### Email tab
The Email tab controls the invitation recipients receive when the survey is distributed through a campaign. By default it uses a simple form; an **Advanced Mode** checkbox unlocks the full email editor.
By default, fill in a few fields and Statisfy generates a clean, branded invitation for you, with a live preview alongside:
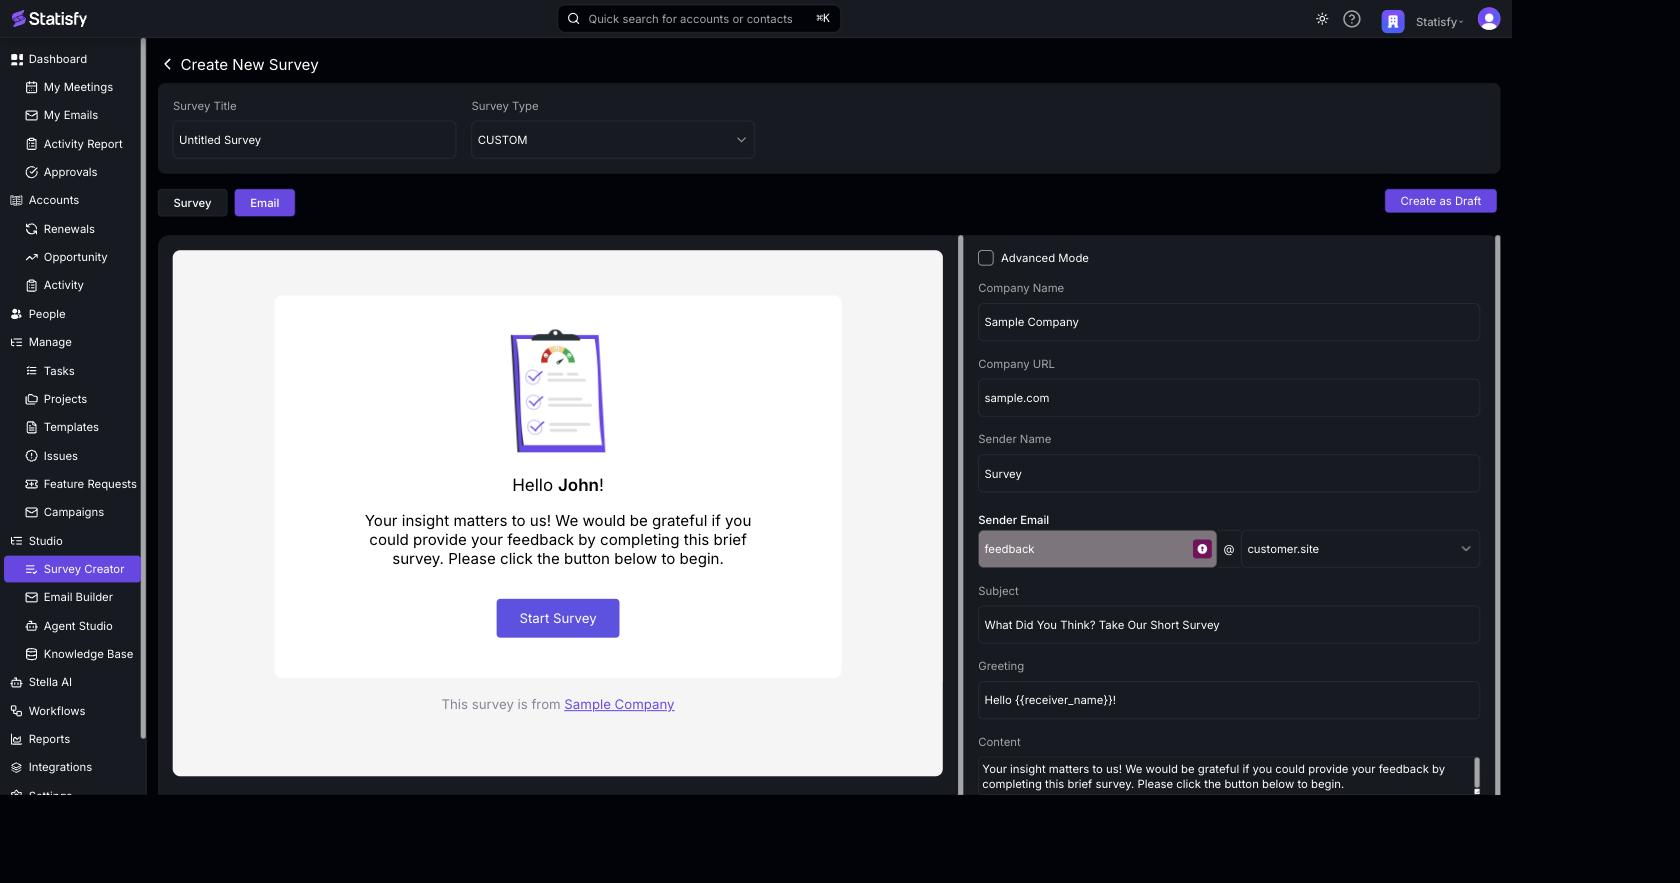
* **Company Name** and **Company URL**
* **Sender Name** and **Sender Email**
* **Subject** — e.g. *"What Did You Think? Take Our Short Survey"*
* **Greeting** — e.g. *"Hello {{ receiver_name }}!"*
* **Content** — your invitation message
The `{{ receiver_name }}` token is replaced with each recipient's name when the invitation is sent.
Tick **Advanced Mode** to build the invitation in the full drag-and-drop email editor instead of the simple form — the same editor used for [email templates](/campaigns/email_templates), including a **HTML Only Mode** option. Add a **Begin Survey** block so the call-to-action links to the survey. This gives you complete control over layout and [personalization](/campaigns/personalization).
### Saving and Publishing
* **Create as Draft** — saves the survey so you can keep editing.
* **Publish** — finalizes the survey. Once published it is locked and ready to attach to a campaign.
### Distributing a Survey
Surveys are sent to customers through a **survey campaign**:
1. Create a [survey campaign](/campaigns/creating_campaigns#survey-campaign-setup).
2. Select the published survey.
3. Choose the email template for the invitation (the survey link is inserted automatically via the `{{ survey_url }}` tag / Begin Survey block).
4. Select your [audience](/campaigns/managing_audiences) and publish.
Recipients receive the invitation, click through, and submit their responses on a hosted survey page.
### Analyzing Responses
As responses arrive, view aggregated results in **survey analytics** for each survey. Analytics visualizes the distribution of answers per question so you can spot trends in NPS, CSAT, and custom questions. Responses collected through a campaign are tied back to the recipient and campaign for attribution. See [Campaign Analytics](/campaigns/campaign_analytics#survey-response-metrics) for how per-recipient responses appear on a survey campaign.
### Next Steps
Build the invitation that distributes your survey.
Distribute your survey to an audience.
Target the right customers.
Personalize survey invitations with merge tags.